Today we'll be speaking with Robert Komatsu, ACE about his most recent film - Freaky…

How (and why) to Use Timeline Markers
One of the best ways to build out a strong organizational foundation on your timeline is by using Markers. In this tutorial, we’re going to be using Premiere Pro to show you why they are so helpful and exactly how to use them. Watch the video or read the post below!
Markers are pretty great – they can be used for a number of functions:
- Notes – You can simply use them to leave a note for yourself.
- Snapping – Marking a point on your timeline allows you to snap your playhead to it, making it easier to locate the exact moment required.
- Significant Events – Using a Marker makes it much easier to find significant events in the timeline later.
- Important List – Create a list with a Marker containing important things relevant to the point in the timeline, such as any visual effect shots you have, or if you need to add some stabilization to a shot later on.
Adding Markers
Here’s how to add Markers and manipulate them a bit. In the example below, let’s say you have a shot that you don’t like, but you want to keep it in place for the time being. To remind yourself to change the shot later, add a Marker. Move the playhead where you want the Marker to be, (checking nothing is selected on the timeline), and then click the Marker icon.

Modifying Markers
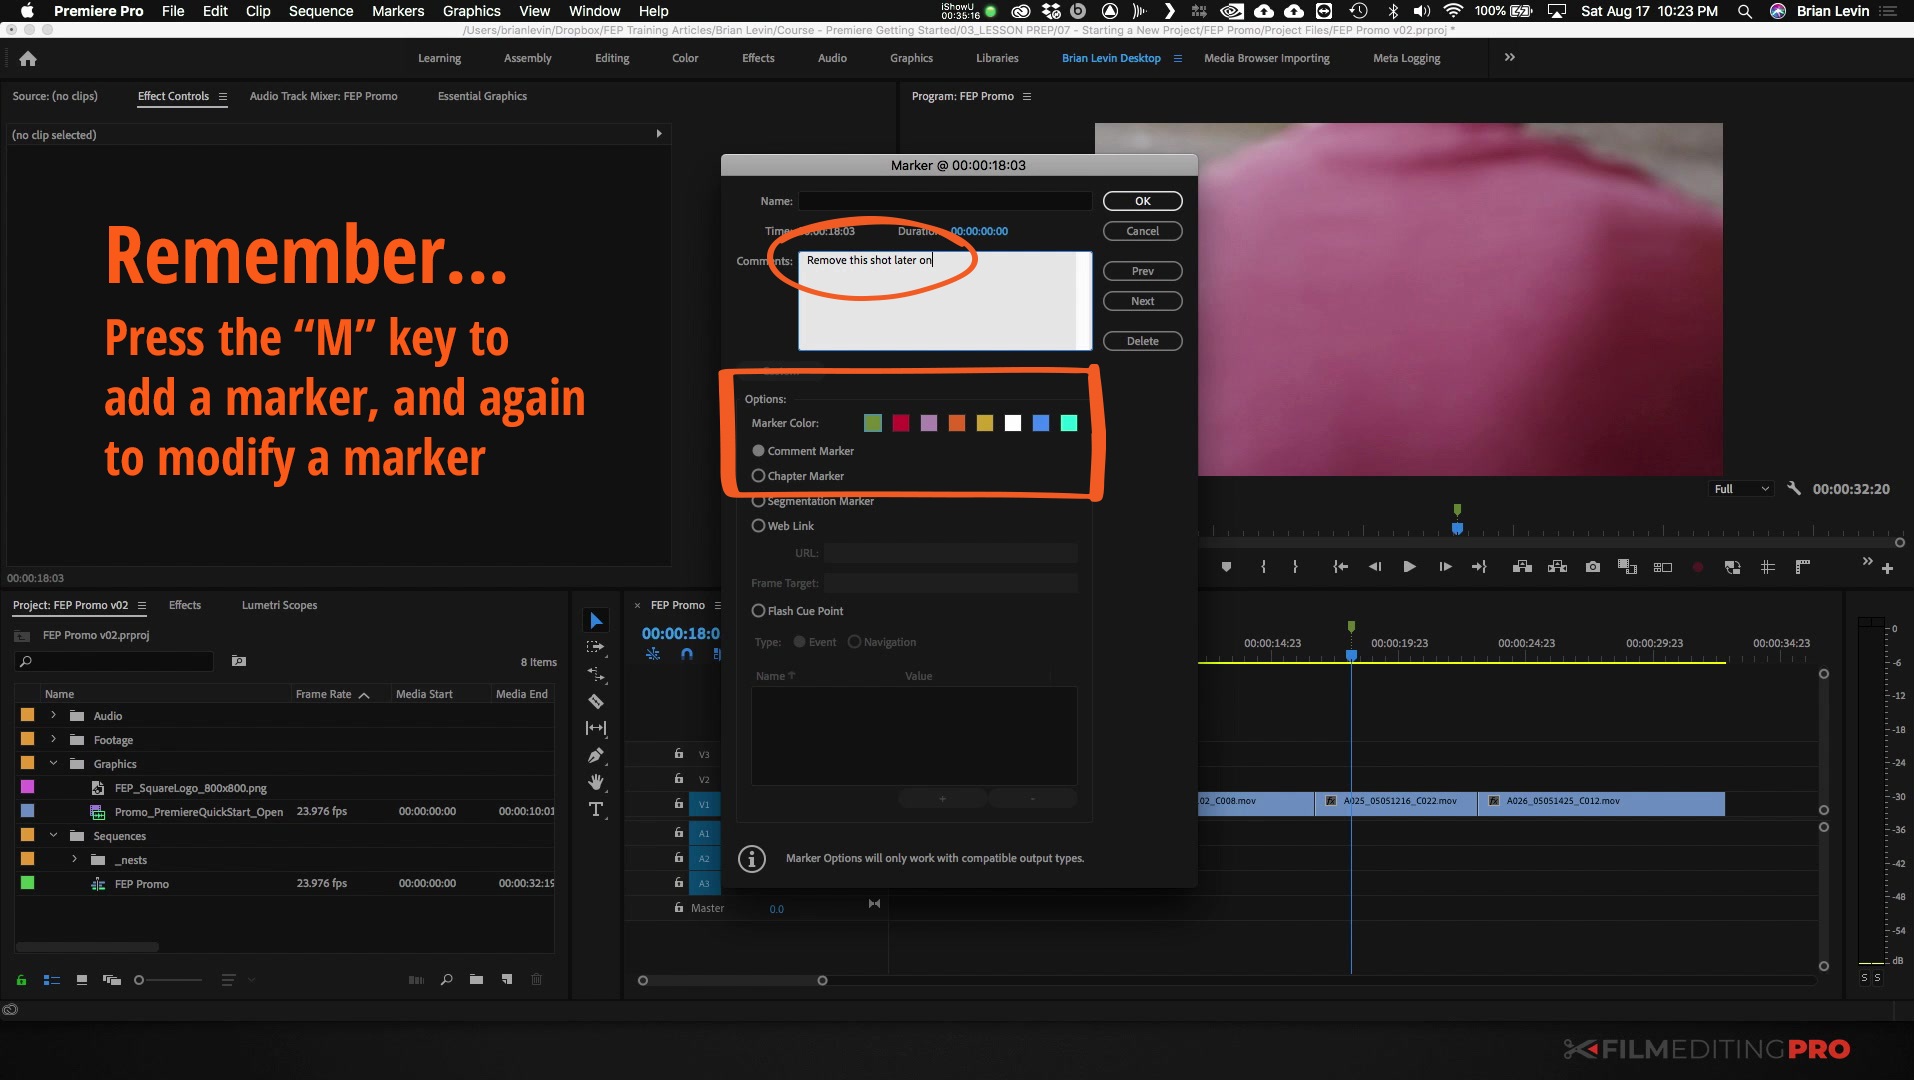
Once you’ve added a Marker, you can do a lot of really cool stuff with it. Double click on the Marker, or move the playhead to the Marker and press the ‘M’ key (M is the shortcut for both adding and modifying a Marker). This will bring up a menu which lets you add more detail – like a comment, or changing the Marker’s color to signify something.
In this example below, you can see a comment has been added to remove the shot later on, and it will be colored red to signify this is something really important to do. Click ‘Okay’ once you’re done making any changes to save it.
Spanned Markers
Currently, that note isn’t visible, but it’s definitely there. Here’s what you can do with Markers to make the notes more visible, by creating a Spanned Marker. Instead of a Marker being a fixed point, give the Marker a beginning and end point to indicate a certain amount of time.
Hold down the Option key and drag the Marker out to do this. You’ll notice you can start to see what’s written on the comments. The Marker can be dragged at both ends to align it with something specific if you want , and it appears both in the timeline and the program window.

Clip Markers
The Timeline isn’t the only area that you can add Markers – they can also be placed on clips. In the next example, you might have a clip that you love, but would like the visual effects person to add some beams of light to make it a cooler shot. So instead of adding a note on the Timeline, add it to the clip by selecting the clip and pushing the ‘M’ key to add a Marker.
Pressing ‘M’ a second time will bring up the menu, where you can add more information. In this case, the color has been changed to Orange and a comment has been added about sun beams to the shot. Be sure to click ‘Okay’ to confirm the changes.
Be careful however, dragging the Marker like you did before doesn’t work when it’s on a clip. To drag the Marker, you need to get into the clip by double clicking on it. This will load it up into the source window. Here, you can drag the Marker out to the desired length, showing the comment.
You’ll notice that the Marker is spanned in the source window and on the Timeline. In fact, if you were to cut the clip and remove the section containing the Marker, that Marker will still be there. If you decide later that you want to extend the clip and include the section with the Marker, it will reappear as you left it. If you don’t need a Marker anymore, double click on it to bring up the Menu and select ‘delete’, or right click on a Marker and select ‘Clear all Markers’.

Wrap Up
Once you’ve become familiar with using markers you will likely begin to see many more uses for them throughout your timeline. For more tutorials about Premiere Pro or creative editing in general be sure to visit our training page. There, you can sign up for hours of free sample videos and more information about our full courses.
Leave Your Thoughts & Comments Below:
Related Posts


