Today we'll be speaking with Robert Komatsu, ACE about his most recent film - Freaky…

Multicams or Merge Clips in Premiere Pro: Which is Best?
In this post, we’ll be talking about the pros and cons of working with multi-cams and merged clips in Premiere Pro.
Premiere is a powerful editing tool, and one of its greatest strengths are its incredibly adaptable sequences, especially the multicam. You might have no idea what a multicam is, and that’s okay because you’re going to learn all about what makes them so great, and how they compare to the “merge clips” feature.
Watch the video or keep scrolling to read the transcript!
First, you may have heard the term “multicam” but exactly is it?
Well, when you have footage from one source, the camera for instance, and audio from another source, perhaps it’s the audio recording device your sound recordist was using, you need a way to sync them up so that they stay connected while you are editing.
Traditionally, you might think “merge clips” sounds like the way to accomplish that but there’s another, better, way to do it and that’s to create a multicam.
So, let’s break down the differences between these two options and figure out how they stack up against each other.
Challenge 1: Number of Clips you Can Combine
The first important thing to know about multicams vs. merged clips is the amount of footage and audio you can combine.
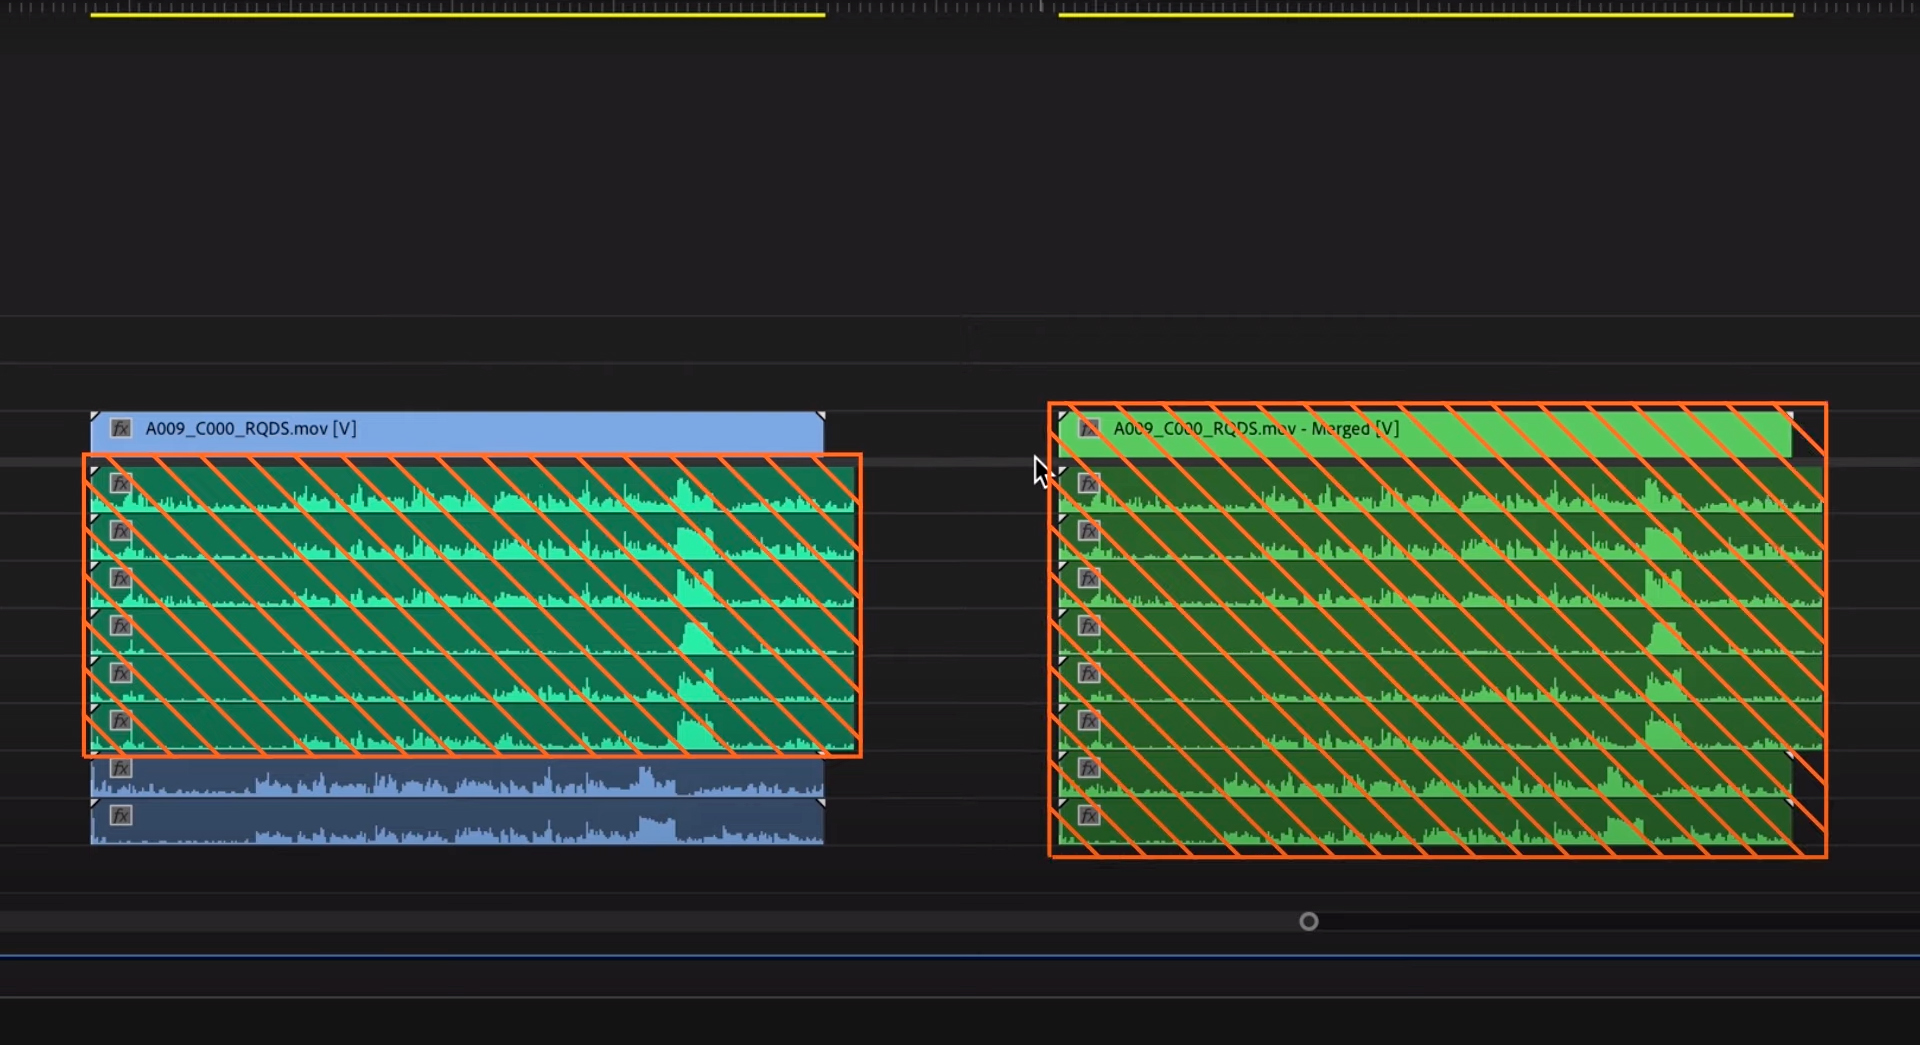
With merged clips, you can combine one video source, and as many audio sources as you want. This means if you were filming with one camera and multiple audio sources, such as a boom microphone, a lavalier, and the on-camera audio, you can combine all of that audio together with one source of video.
But if you were filming with two or more cameras, such as working on a scene with many characters at once, or conducting an interview or filming a music performance, you would not be able to merge all of those video clips together. That’s where multicams come in.
Multicams can combine as many video and audio sources as you want.
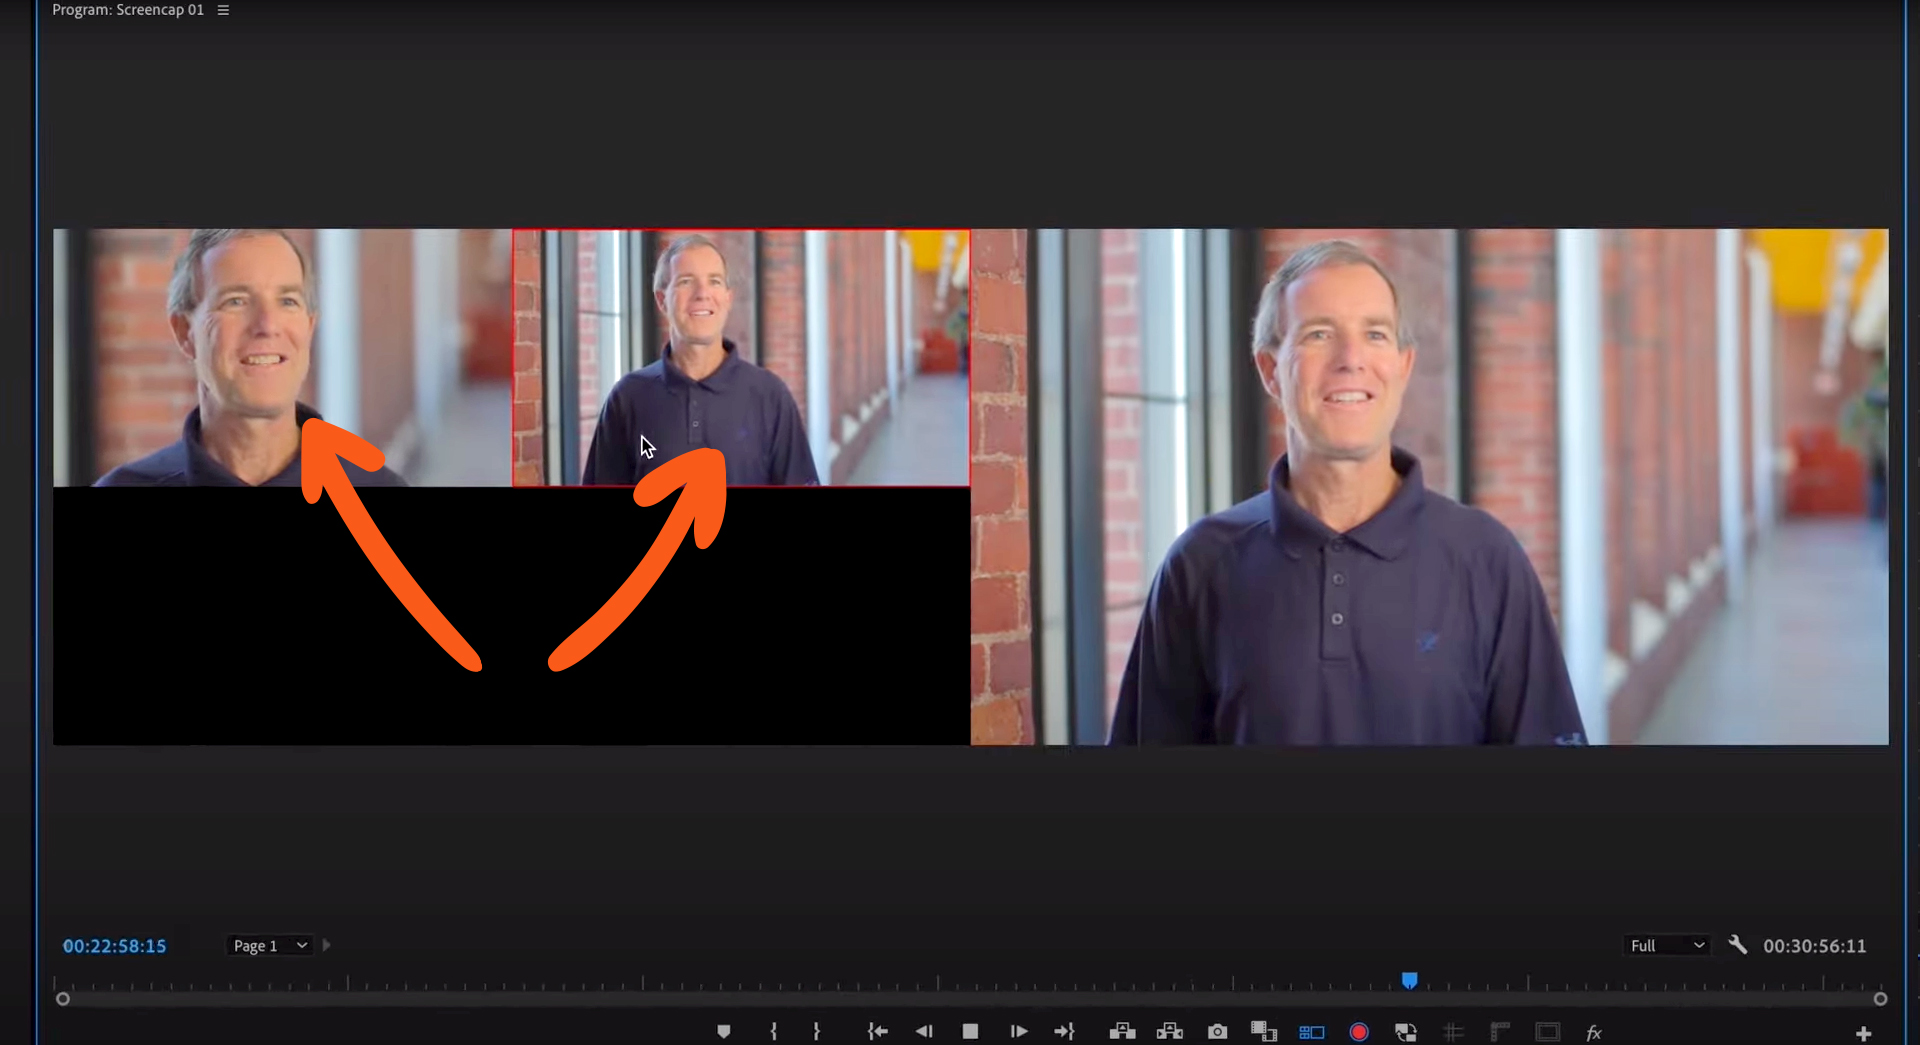
This is especially important if you want to use the powerful multicam camera switching tools in Premiere to pick the camera angle you want to view, and even cut between them during live playback.
WINNER: MULTICAM
Multicams win this category, and that’s because not only can you use multicams to sync one source of footage and audio, it’s also possible to actually adjust your multicam AFTER you’ve created it.
Challenge 2: Modifying Synced Clips After Creating Them
So the next item on the checklist is modifying the synced clips after you’ve created them.
Once you create a merged clip, you are unable to modify it. It’s basically like a brand new clip in your bin, and you can’t change it. So if you made a mistake, and maybe misaligned the audio and the video, or accidentally used the wrong track from the audio recording and want to swap it out, that won’t be possible without actually re-creating the entire merged clip.
Whereas multicams are, essentially, just nested sequences with some fancy settings. So once you make a multicam, you can choose to Open in Timeline, and this will allow you to see the contents of the multicam, and modify them as needed.
WINNER: MULTICAM
Not all productions are created equal when it comes to being precise with recording audio and video, many editors need to have that kind of adaptability in their workflow to change things after the fact. This is especially true if you work on non-narrative projects where you might be discovering what video clips sync to which audio clips as you go along.
Challenge 3: Metadata
And that brings up the next point, and that’s how metadata is preserved and used when you create merged clips or multicams.
Now you may be asking “What do you mean by metadata?” There are two key pieces of metadata that most editors like and your color and sound vendors need for a successful collaboration.
The first is “tape name” or “reel name.” You may have seen this term on the Relinking Offline Media screen. This piece of metadata is great for helping software like Premiere and DaVinci Resolve successfully relink from transcoded media, like what you might edit with, to the full resolution camera masters, that you might use for color grading.
The second piece of metadata is the iXML tags stored in your professionally recorded audio files. This information tells you what each track in your audio file is, and although Premiere unfortunately doesn’t have a simple way to view this information in the timeline, software like ProTools does and sound mixers use that to help them sort and organize on their end.

Now, let’s talk about how this pertains to merged clips and multicams. Well, merged clips effectively make brand new clips in your bin, and in doing so Premiere strips out of some of this information. Things like the iXML track names and the original audio file name are no longer available, so if you created an OMF or AAF file to do a turnover to your sound team, they wouldn’t receive that information from the audio you have connected to your merged clips.
There are workarounds to make this process work, however we strongly suggest you skip merged clips altogether because multicams will retain that important information for you all the way through your edit.
Once you are done editing with multicams and are ready to send your sequence to your sound team, you can simply flatten your multicams, which will get rid of them in your timeline and replace them with the original audio or original video that was inside of them. This makes doing turnovers to your sound team really easy because all of that metadata is going to come along with your files now.
WINNER: MULTICAM
Multicams are the clear winner in this category, as they will preserve all of your important metadata and are completely non-destructive in your workflow.
Challenge 4: Match Frame
And that brings us to another very important editing tool. Match Frame.
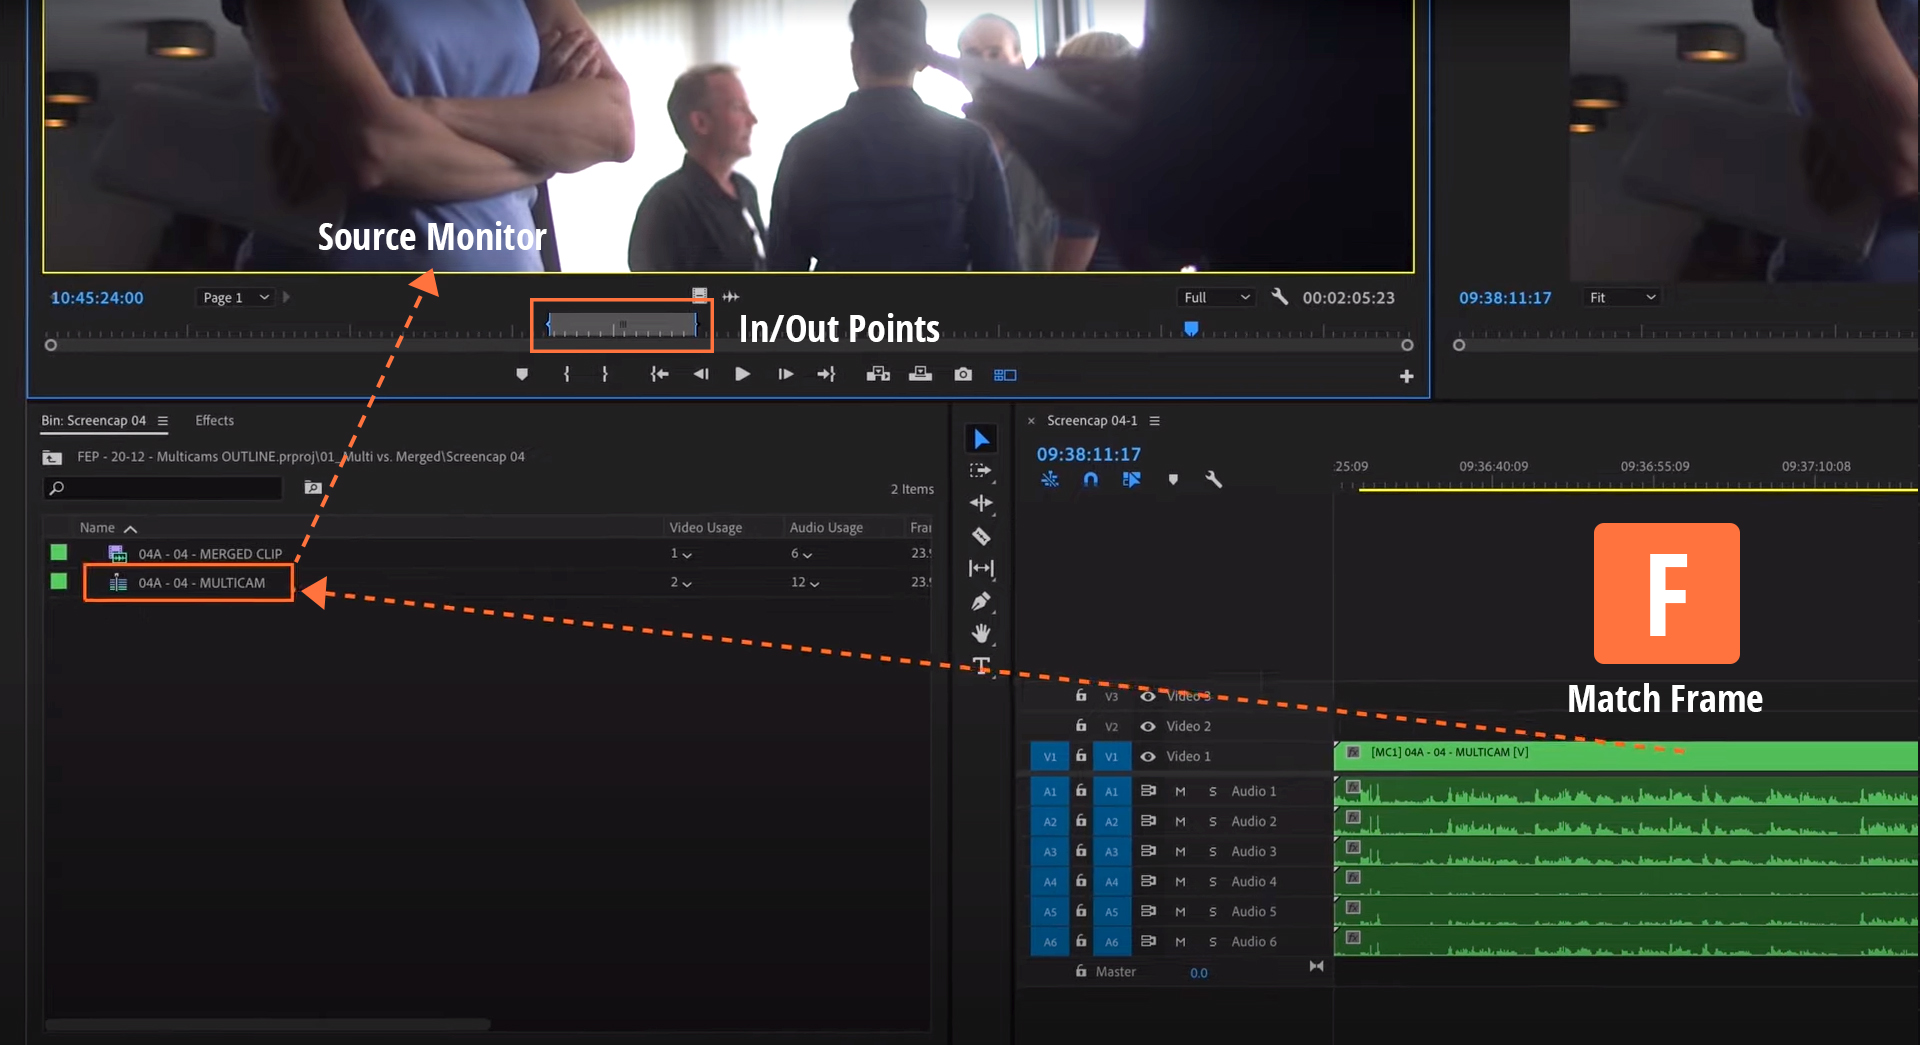
Match Frame is a vital tool in your editing arsenal. If you aren’t using it right now, here’s a quick demonstration. In your timeline, hover your playhead over a clip. The default shortcut key for Match Frame in Premiere is “F.”
That will load the clip you are hovering over into the source monitor. Unlike simply double clicking on the clip in the timeline to load it into the source, Premiere went into the bin, found that source clip for you and loaded it into the source monitor with the In and Out Points set to match what you have in your timeline. At this point, you can only imagine the power this tool provides.
Fortunately Match Frame works great with both merged clips and multicams but with caveats.
When you use Match Frame to load a merged clip into your source monitor, you have all of the same great tools at your disposal. You can cut a clip into your timeline, drag just the video or just the audio and change the In and Out points. However, if you for some reason needed to get back to the ORIGINAL footage that was used to create that merged clip, you wouldn’t be able to very easily.
Multicams, however, can take Match Frame one step further. Once you use Match Frame to load the multicam into your source monitor, you can press Match Frame a second time, and that will take you INSIDE the multicam and load the actual video source into your source monitor.
Now you are probably wondering why I would ever want to do that? Well, it depends entirely on your workflow. For instance, you might need to quickly find the bin of footage from that day of filming as you are hunting down a clip that you need.
That’s easy with multicams because you can Match Frame from the timeline to the source, Match Frame from the multicam source to the original video source and then right click and choose Reveal in Project. And voila! You have a bin containing the original footage that was contained inside of the multicam, along with all of the other video clips from that day of filming. You might often do this when exporting video files for VFX vendors to make sure that you’re pulling from the original source footage to send out.

So you can indeed use Match Frame on both merged clips and on multicams, however if you need even more functionality within Premiere, multicams will let you take Match Frame one step further and reveal the actual source footage.
WINNER: MULTICAM
Challenge 5: Working in Your Timeline
How do multicams work in your timeline compared to merged clips?
Well, the good news is that they work just like any regular clip in your timeline. You can grab them and move them, you can unlink or link the audio from the video, you can scale and position them, apply effects, stack them, draw a little car with them, whatever you want to do.
There is one finicky thing you should be aware of with multicams. If you edit with a multicam in your timeline and you should happen to unlink the audio from the video, Premiere can get a little bit confused about what those audio clips are, since they are technically still a multicam, but they are also just a nested sequence.
If you double click on audio that has been unlinked from it’s video, it’ll take you inside the multicam timeline. This isn’t a big deal, you don’t really ever need to double click on any clips in your Premiere timeline to bring up things like the effects controls, so if you’ve developed a “no double clicking” muscle memory, you probably won’t ever run into this problem.

WINNER: IT’S A TIE!
Wrap Up
So who wins the challenge? For us, multicams are the clear winner. They offer the kind of flexibility needed to keep projects organized and able to scale up as they progress.
That’s not to say you should never use merged clips. If you are an editor who is working by yourself in a vacuum, and you don’t plan to do any turnovers to sound, color or VFX, then merged clips will probably work just fine for you.
But if you are often collaborating with many different departments in post production, you’ll want to develop a workflow that doesn’t remove important metadata from clips and allows you the most flexibility to adapt and change things as you go.
Leave Your Thoughts & Comments Below:
Related Posts


