We've all heard of Speed Ramping, but how can you actually use this tool effectively…

How to Cut Smoother Dialogue Using Room Tone & Ambience
Knowing how to polish up your audio is hugely important to the dialogue editing process.
Whether you’re passing your final audio mix along to a dedicated sound team or you’re doing it yourself, you still want to be working with dialogue that sounds “good.”
This will allow you, the director, client, producer, what have you, to experience the piece more like the way your audience will when they’re watching the final version. So how do you accomplish this? Check out the video below or keep scrolling for a short transcription!
As you’re rough cutting, you’ll want to make sure that you aren’t distracted from how a moment REALLY feels due to excessively poor-quality audio. Smoothing your dialogue ensures you can generate that layer of believability so crucial to the construction of your story.
One of the most common ways to do this is by using room tone and ambiance to smooth out your dialogue.
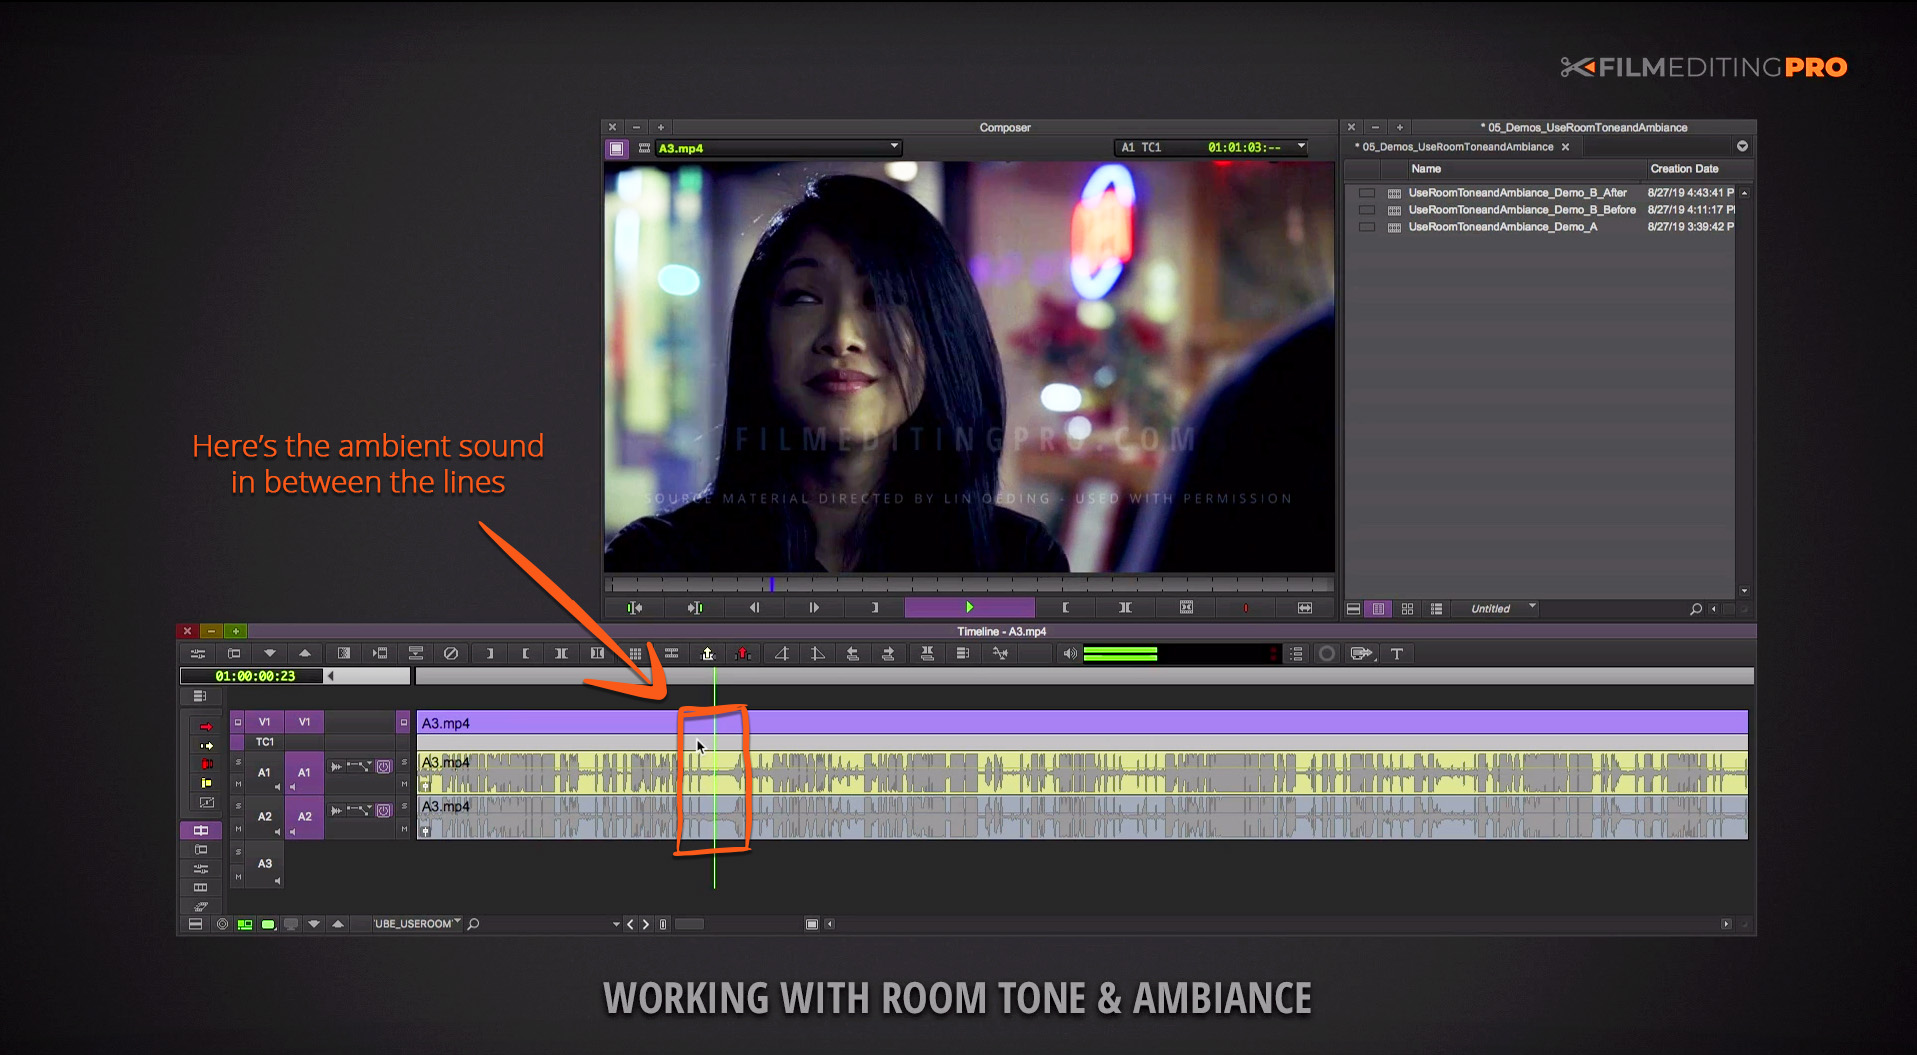
When a character has finished delivering a line, there is often a bit of space or “dead air.” The noticeable absence of background hum and noise can take a viewer momentarily out of the story.
That’s where room tone comes in. Room tone is the subtle, low-volume sounds present in every room. It obviously isn’t complete silence because air ducts, outside sounds, and other subtle audio hums and buzzes are often captured. When shooting exteriors, these sounds are referred to as ambiance. In certain respects, room tones and ambiance are like fingerprints: every one of them is unique, even if the differences are very subtle.
Let’s dig in a bit more and see how to clean up dialogue with room tone and ambiance in your real-world editing.
Step 1: Find the Room Tone or Ambiance
You need to find the room tone or ambiance in your footage. It’s most frequently the last thing done on set, so start by looking at the end of a clip. But, if that’s not the case, you can always use waveforms to find areas where dialogue isn’t present.
Step 2: Make a Sub-clip and Cut it In Between Character Lines
This is optional, but we’ve always found it extremely useful. Make an audio-only sub-clip of that room tone or ambiance. This way, it’s at your fingertips when you need it and you don’t have to consume time hunting around for it.
Next, take the background noise and cut it in between the lines of your characters. If it’s long enough, you can add a constant layer of this ambiance to your scene, then keyframe its volume level.
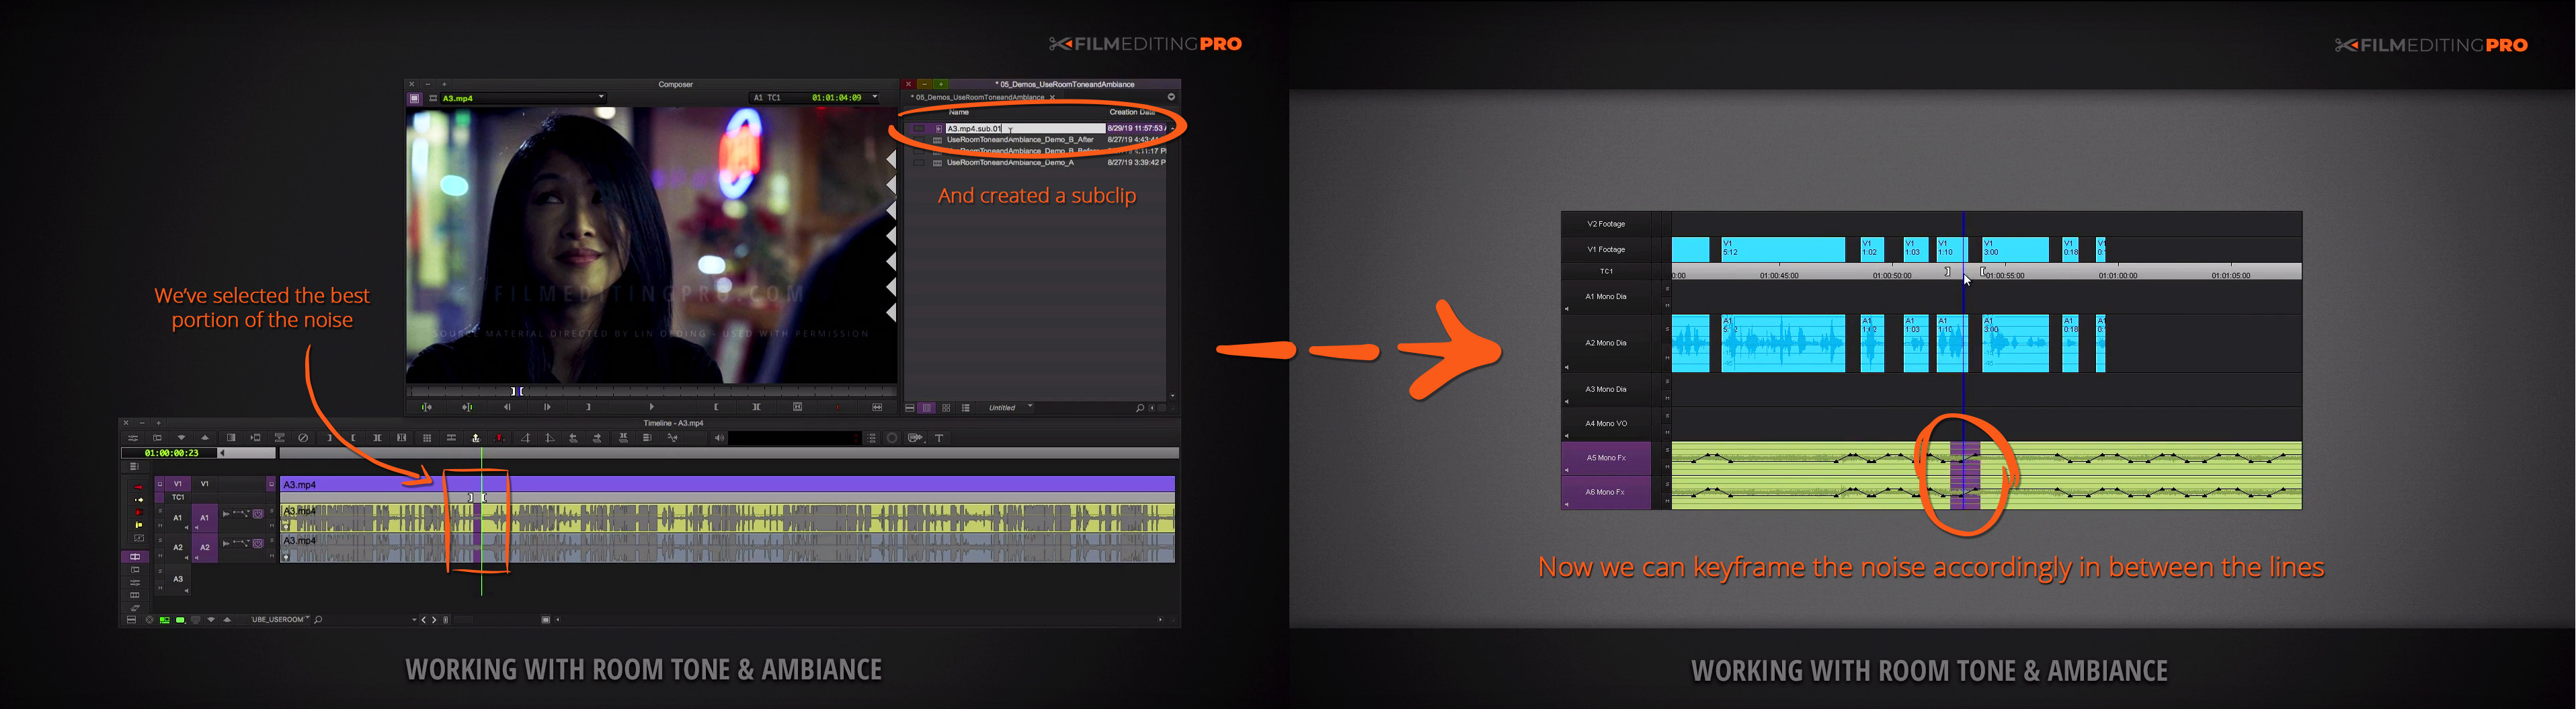
This way, it gets louder and softer during the dialogue. If it’s shorter, like our sub-clip below, we can insert it selectively into our scene and dissolve in and out of it.
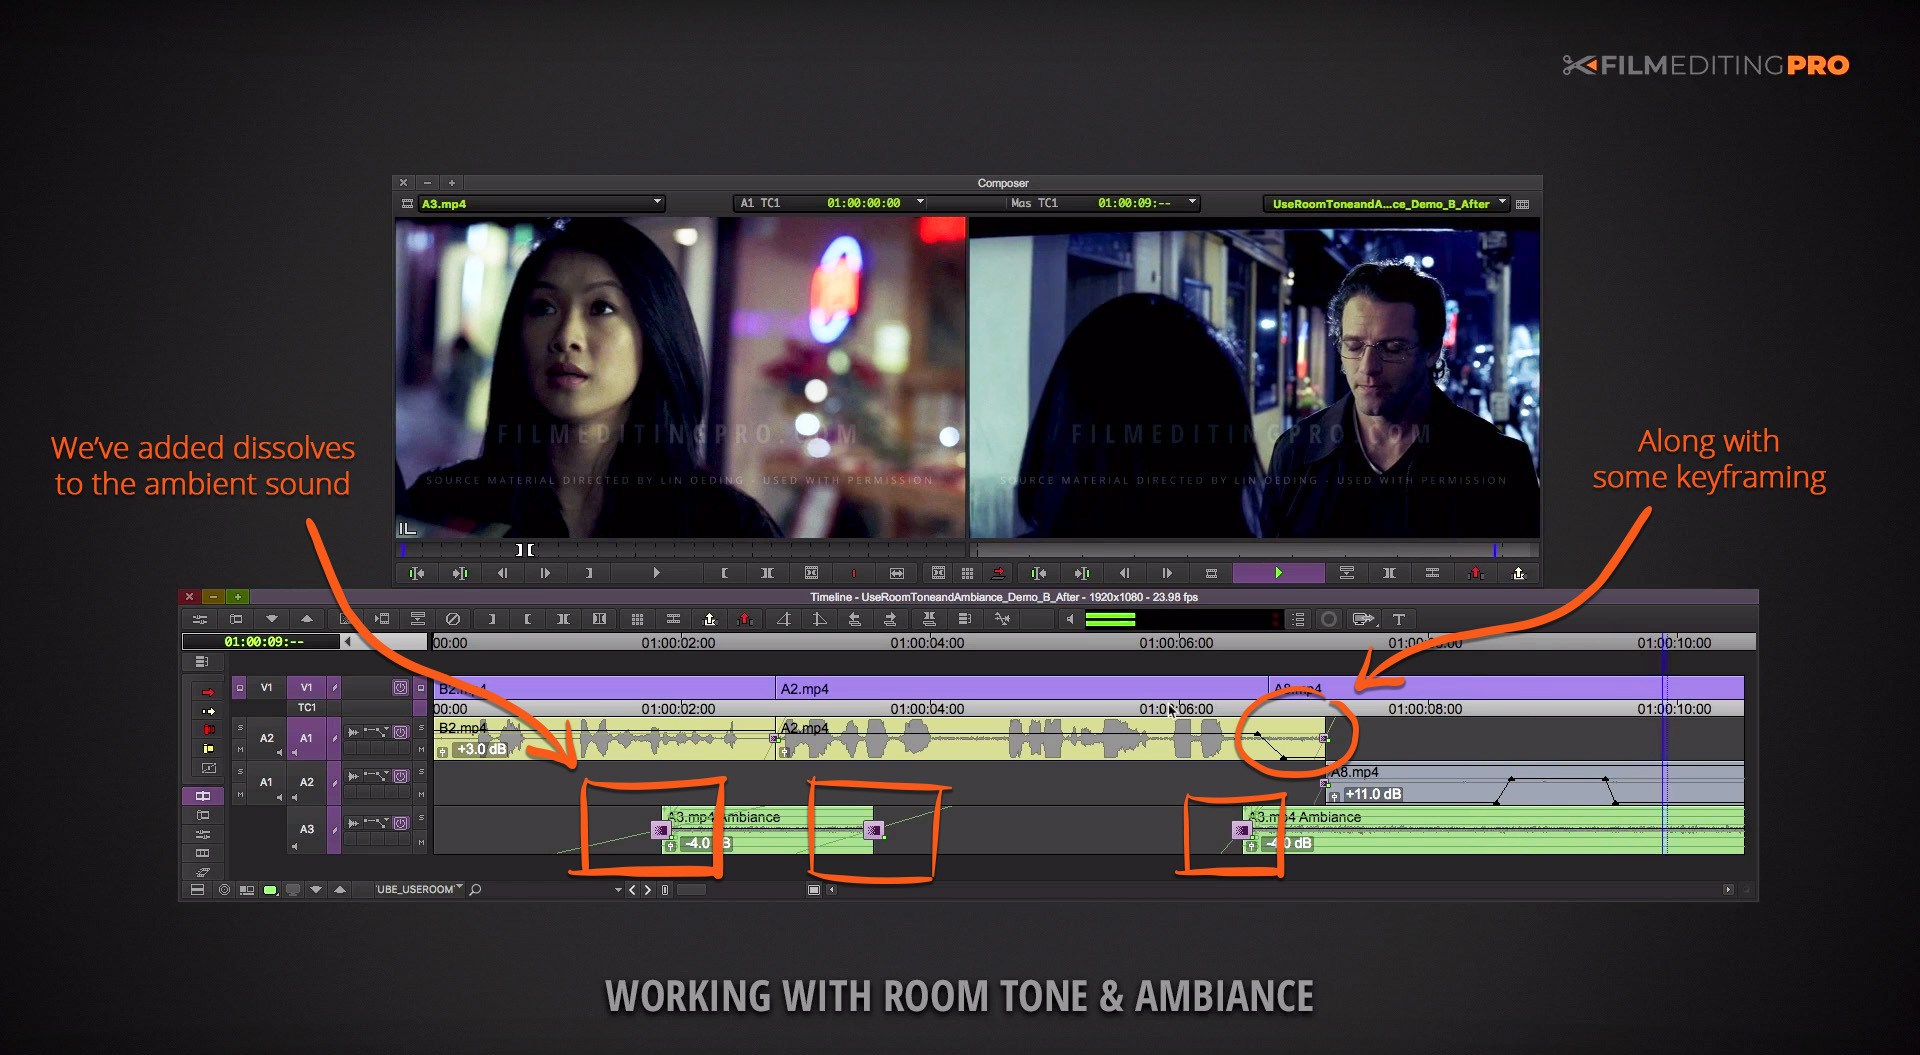
In our experience, we’ve found that when recorded audio is pristine, techniques like these might be just icing on the cake. But when your audio has been recorded on the run, or in a noisy environment like this, it’s going to make a massive difference in your cut’s professional presentation.
So, remember, a good way of smoothing out dialogue gaps is to find a section of the recorded audio track where the characters aren’t speaking, but the microphone still picked up the general ambiance of the room or environment. This will create a more seamless transition from one line to the next.
-Film Editing Pro
Like this post? Let us know! Leave a comment below and be sure to mention anything else editing related you’d like to learn about.
Leave Your Thoughts & Comments Below:
Related Posts


