Hi fellow editors! We're so happy to be back this year with a new trailer…

DaVinci Resolve for iPad – Complete Review & Testing
The beta of DaVinci Resolve is now on the iPad, and we’ve been using it for a few weeks. Our initial impression? It is amazing.
Is this the full version of Resolve or is it limited? Is it good enough to do professional work with? How well does it run and what accessories do you need? If you’re interested in the answers of those questions, then please read on or watch the video below.
Tested on 12.9-inch iPad Pro M2 by FEP trainer Leon Barnard
Interface
By default, Resolve launches into the last project that you opened. The first thing that you will notice is that it looks exactly like the desktop version of Resolve.
You can use your finger or a pencil to navigate, it’s very intuitive. If you’re already used to using Resolve, then there’s next to no learning curve. The only part of the desktop interface that is missing is the Menu Bar, usually visible at the top.
Currently, Resolve on iPad only has the cut and color page. Then there’s the project manager. We love how familiar this is. This will start to give you a sense of how fully featured the iPad app is. We’ve got the same three tabs for connecting to local network or cloud databases. You’ll see it’s even possible to create additional local libraries, but we’re just going to work in the existing one and create a new project.

Accessing Media
There’s no media page yet in DaVinci Resolve for iPad, but we’re sure it’s coming.
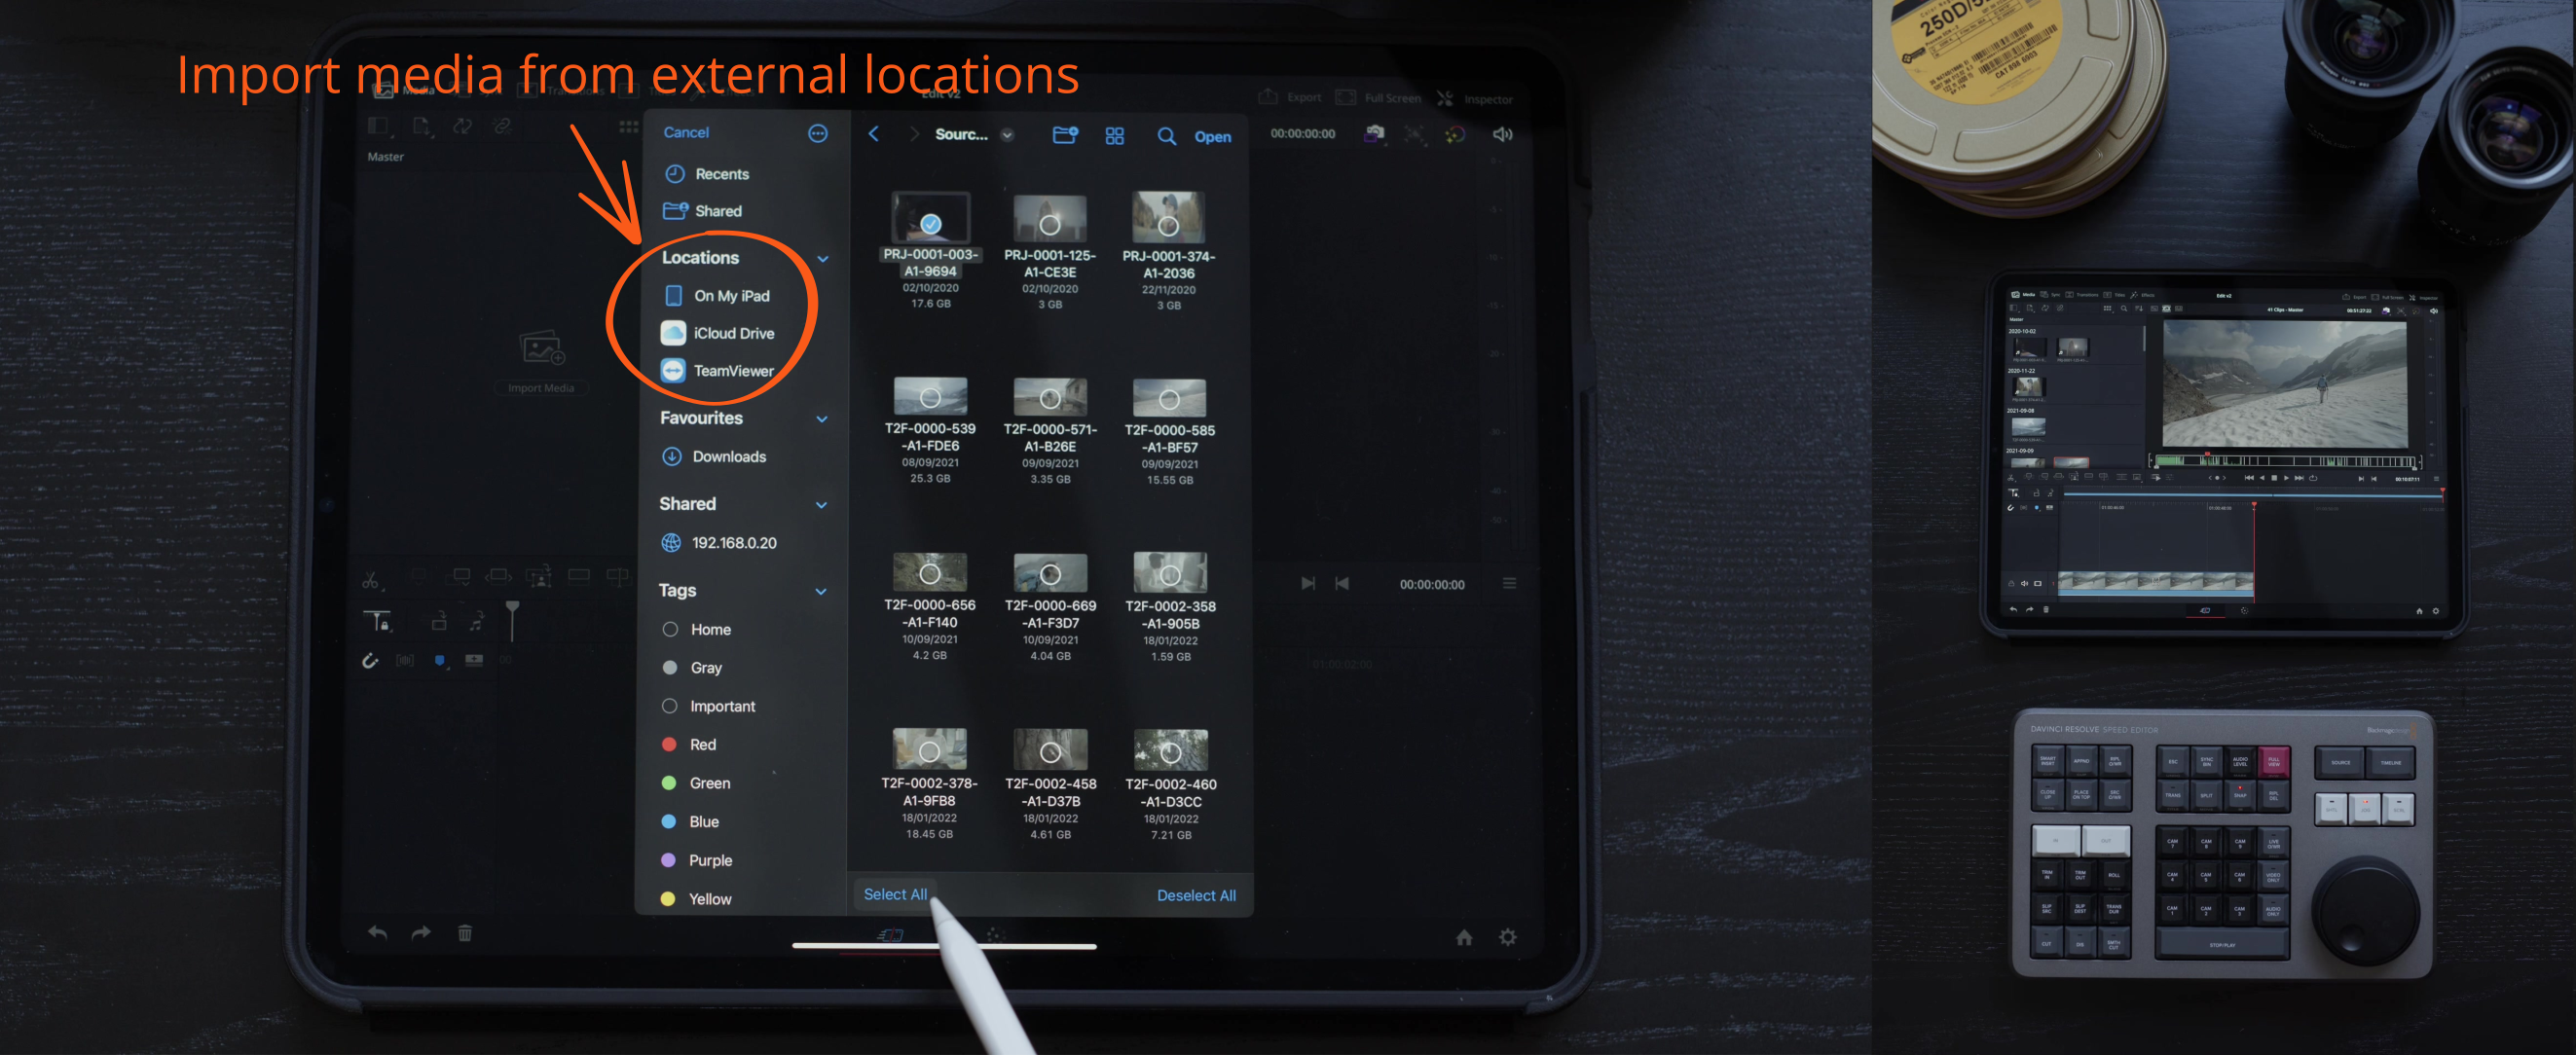
Currently, to import media, we’ll use the media pool in the cut page. Resolve can access any media that you can see in files. That includes attached SSDs, cloud services like Dropbox and iCloud, or even network drives. The media that we’re using, we’ve got about 300 gigabytes of it, is located on the iPad. We’ll select all of the clips in this folder using the select all button and import them.
Resolve handles media exactly the same way as it does on the desktop version of Resolve. It just links to the media wherever it’s stored. The media used for this review is 6K ProRes 422 at 24 frames per second. We can drag clips into the timeline or we can load them in the source viewer and create in and out points, and then bring them down into the timeline.
Peripherals
If you have a Speed Editor, yep, you can use that too. Ours is connected via Bluetooth. Of course, once clips are in your timeline, you edit them the exact same way you would on a desktop version of Resolve, either using the pen, your finger, or alternatively, of course, you can trim them down with the Speed Editor.
We just want to emphasize though the Speed Editor is an optional extra. You do not need this in order to be able to edit comfortably on the iPad.
You might get sick of hearing us say that it’s the same as the desktop version – we’ve only been using Resolve on iPad for about two weeks now, but we’re still blown away by the fact that it looks and functions exactly like the desktop version of Resolve. That’s no mean feat and the interface is surprisingly intuitive on a touch interface. Just the same as the desktop version, timeline settings are configured in project settings. There’s less options here.
Obviously, there are things that you can’t do on the iPad version yet like plug in an UltraStudio, but again, who knows? Maybe the dev team will add features like this in the future.
Settings and Playback
To test this thing out, we set the resolution to UHD. Playback was still fine, with was no stuttering or issues. One of the things that we’re most impressed to see on the iPad is full color management. You can even use ACES Workflow if you wanted to.
Even on the desktop version of Resolve, you can’t set the input color space in the cut page, but you can do it in the color page. We’ve not yet worked out how to set the input color space for multiple clips simultaneously, so we have to go through and do them one by one. It is a bit tedious, but that’s probably just us being stupid. We need to work out how to do it properly.
Even when you pile several clips on top of each other, playback is still pretty good. It stutters slightly, but remember firstly, this is 6K ProRes 422 footage, so that’s a lot of data that Resolve is chomping through, and secondly, this is still beta software. We have no doubt that the dev team is going to further optimize and fix bugs on this before it gets released to the public.
Is it possible to work with anamorphic footage with Resolve for iPad? Of course, Simply find the clip in your media pool, and long press on the clip. Go to clip attributes, and in there, you can change the pixel aspect ratio of your footage – much the same way you would do on the desktop version of Resolve.

Color Grading and Further Stress Testing
Now it’s time to try some color grading. Every single tool that’s available on the desktop version of Resolve is present here on the iPad version, even the effects. Grading on the iPad is exactly like grading on a desktop computer. You have the same tools. They work the same way.
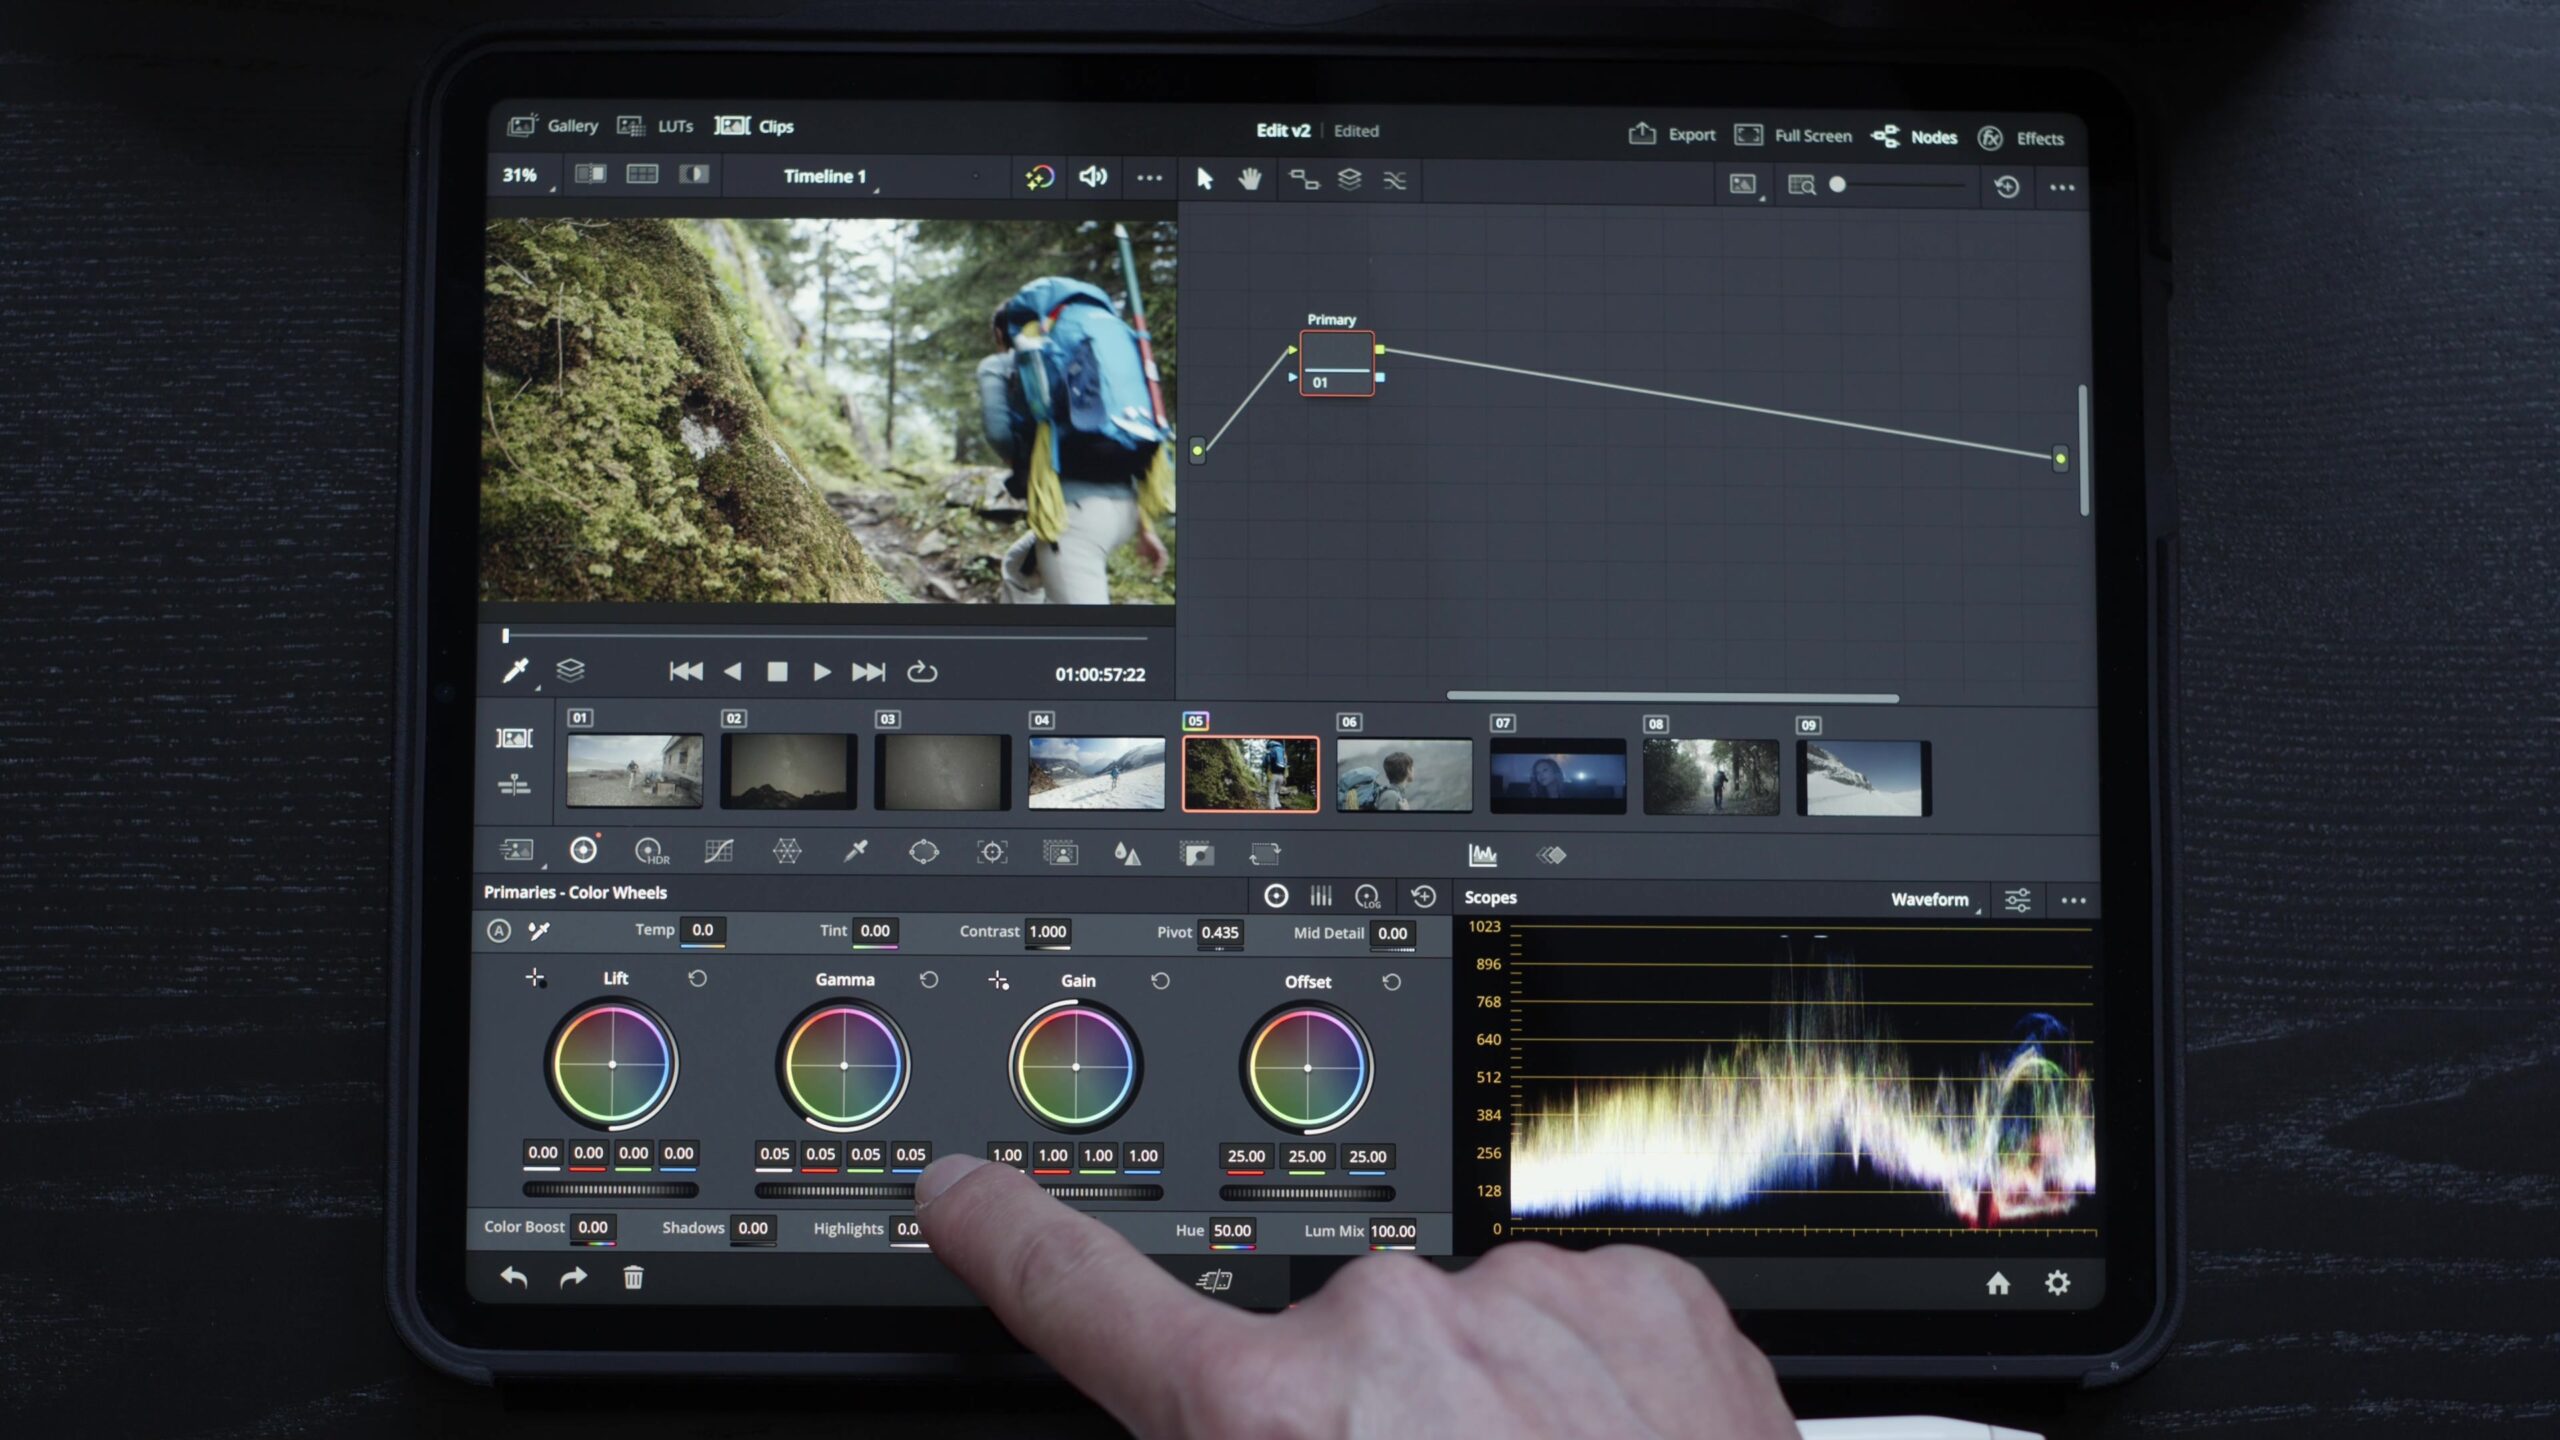
It’s a really cool experience using your fingers to grade. All of the primary tools feel very intuitive to use on a touch screen, it’s almost like you’re using a fancy dedicated control surface. Deleting and redrawing links works exactly as you’d expect. Right click contextual menus are accessed with a long press either with the pencil or with your finger.
But what about more resource intensive effects? For example, noise reduction.
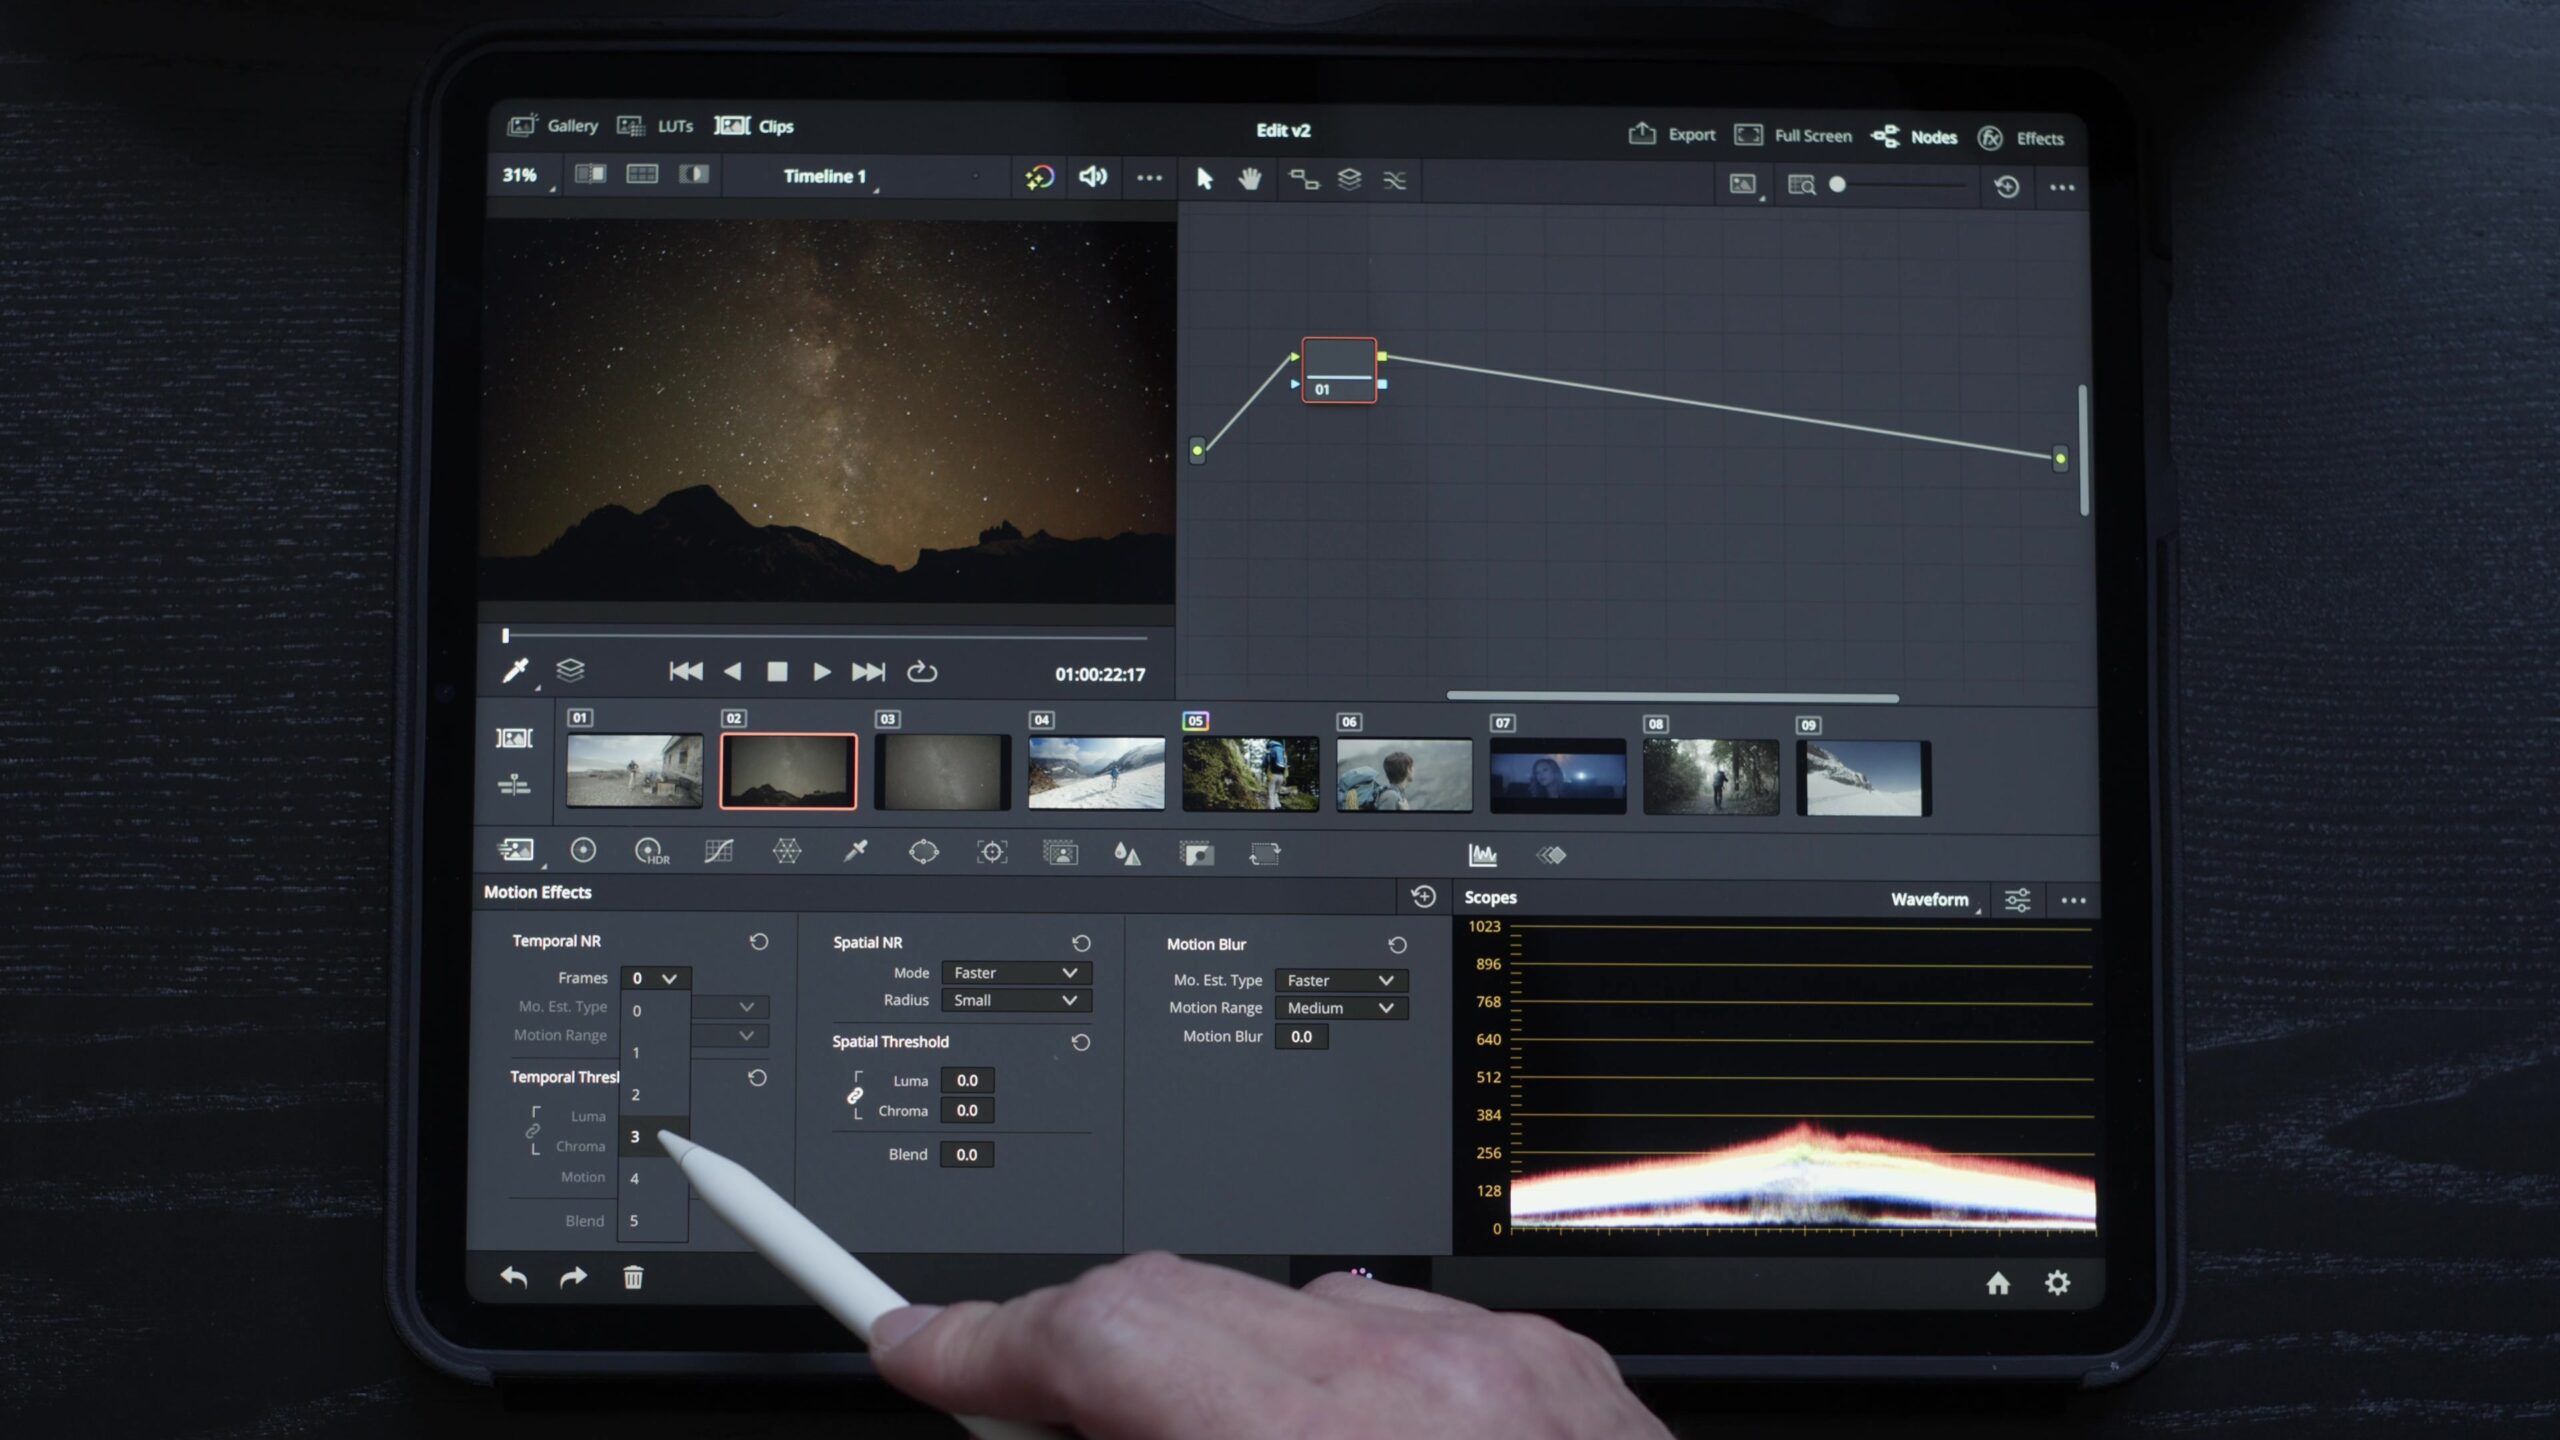
We turned on some temporal noise reduction, and inserted a serial node in to fix the color temperature. It’s not able to play back in real time but that doesn’t surprise us because even on a desktop computer, noise reduction won’t play back in real time. We’d say this is actually very usable, and again, who knows what optimizations are going to come in the future. Even with less frames, it still runs slowly, but it doesn’t matter.
This next clip is a perfect use case scenario for caching the output of this noise reduction node. Yep, you can also do that in Resolve on iPad, but first we need to turn on the render cache.
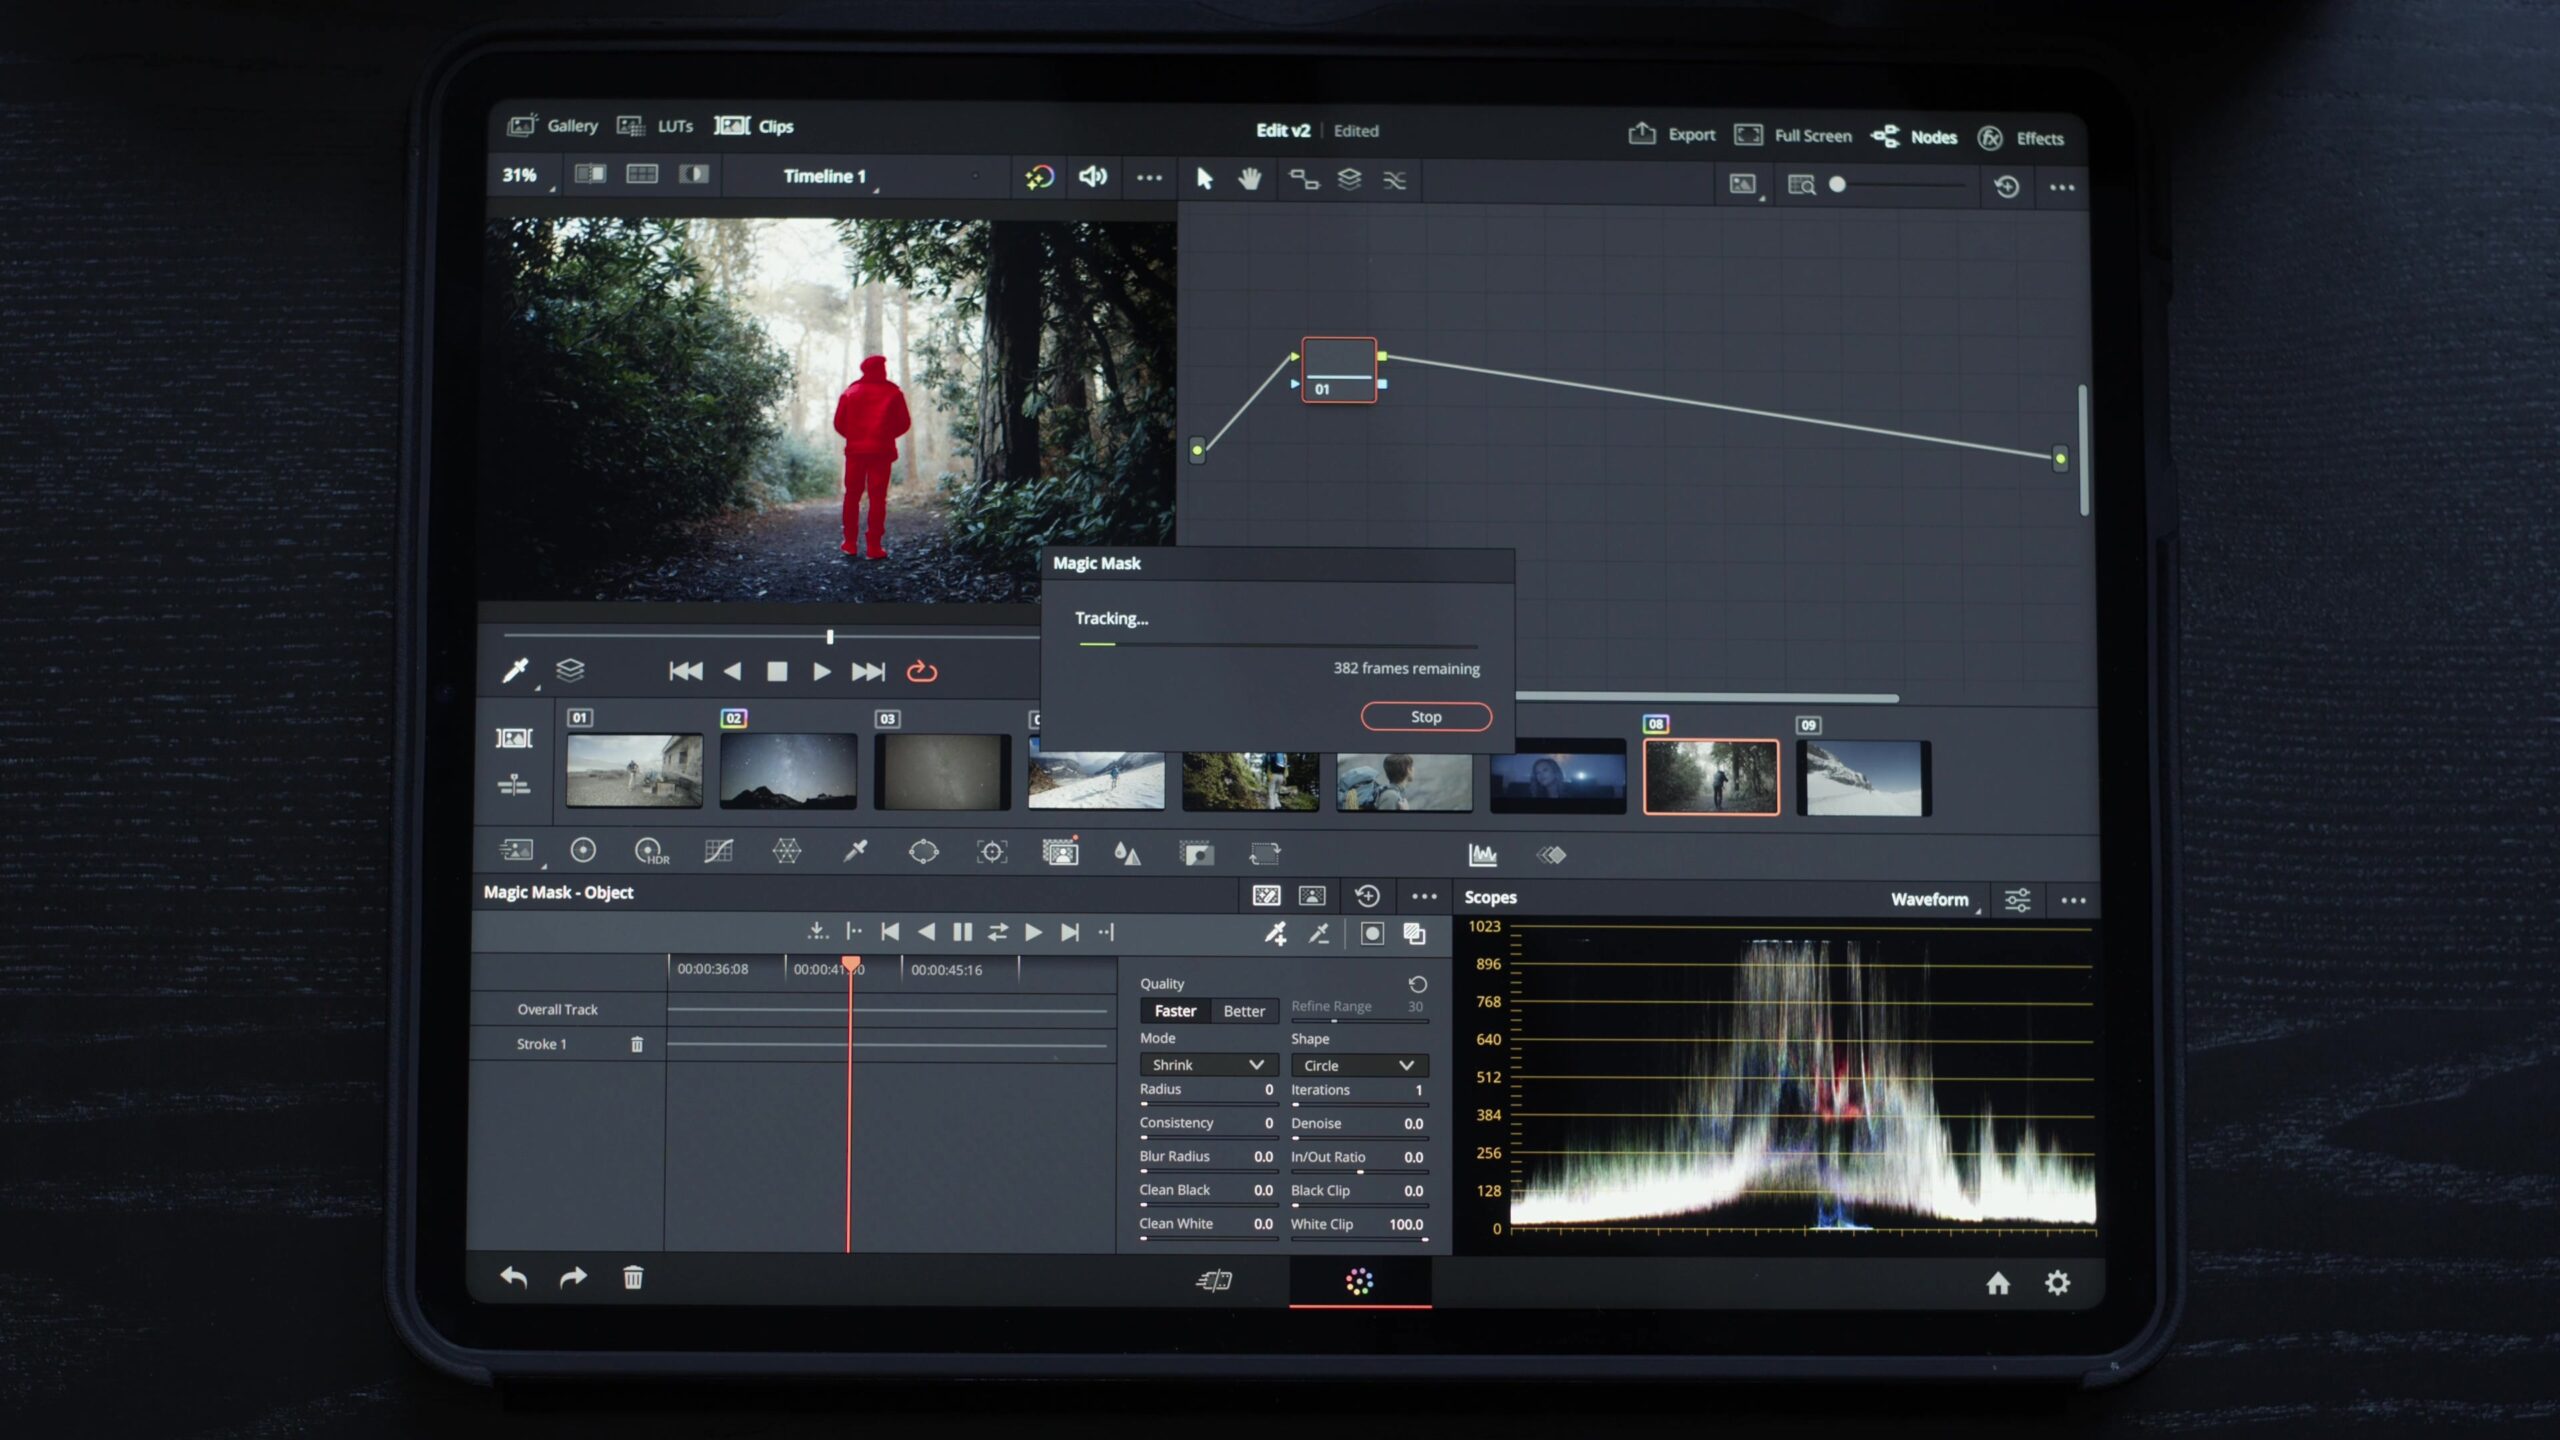
We were a little lost at first because on the desktop version, this is accessed in the menus at the top of the screen. On iPad, it has been moved into project settings. Object tracking, usually a resource intensive effect, is also pretty fast.
One more resource intensive effect we looked at was a depth map, which worked well on the iPad. We’ve got to say that this is very, very responsive.
Finally, let’s demonstrate some creative grading. For this clip we built up a bleach bypass look with a layer mixer, setting up our nodes to feed a color image into the first input, and a black and white image into the second input, before adding some film emulation effects.
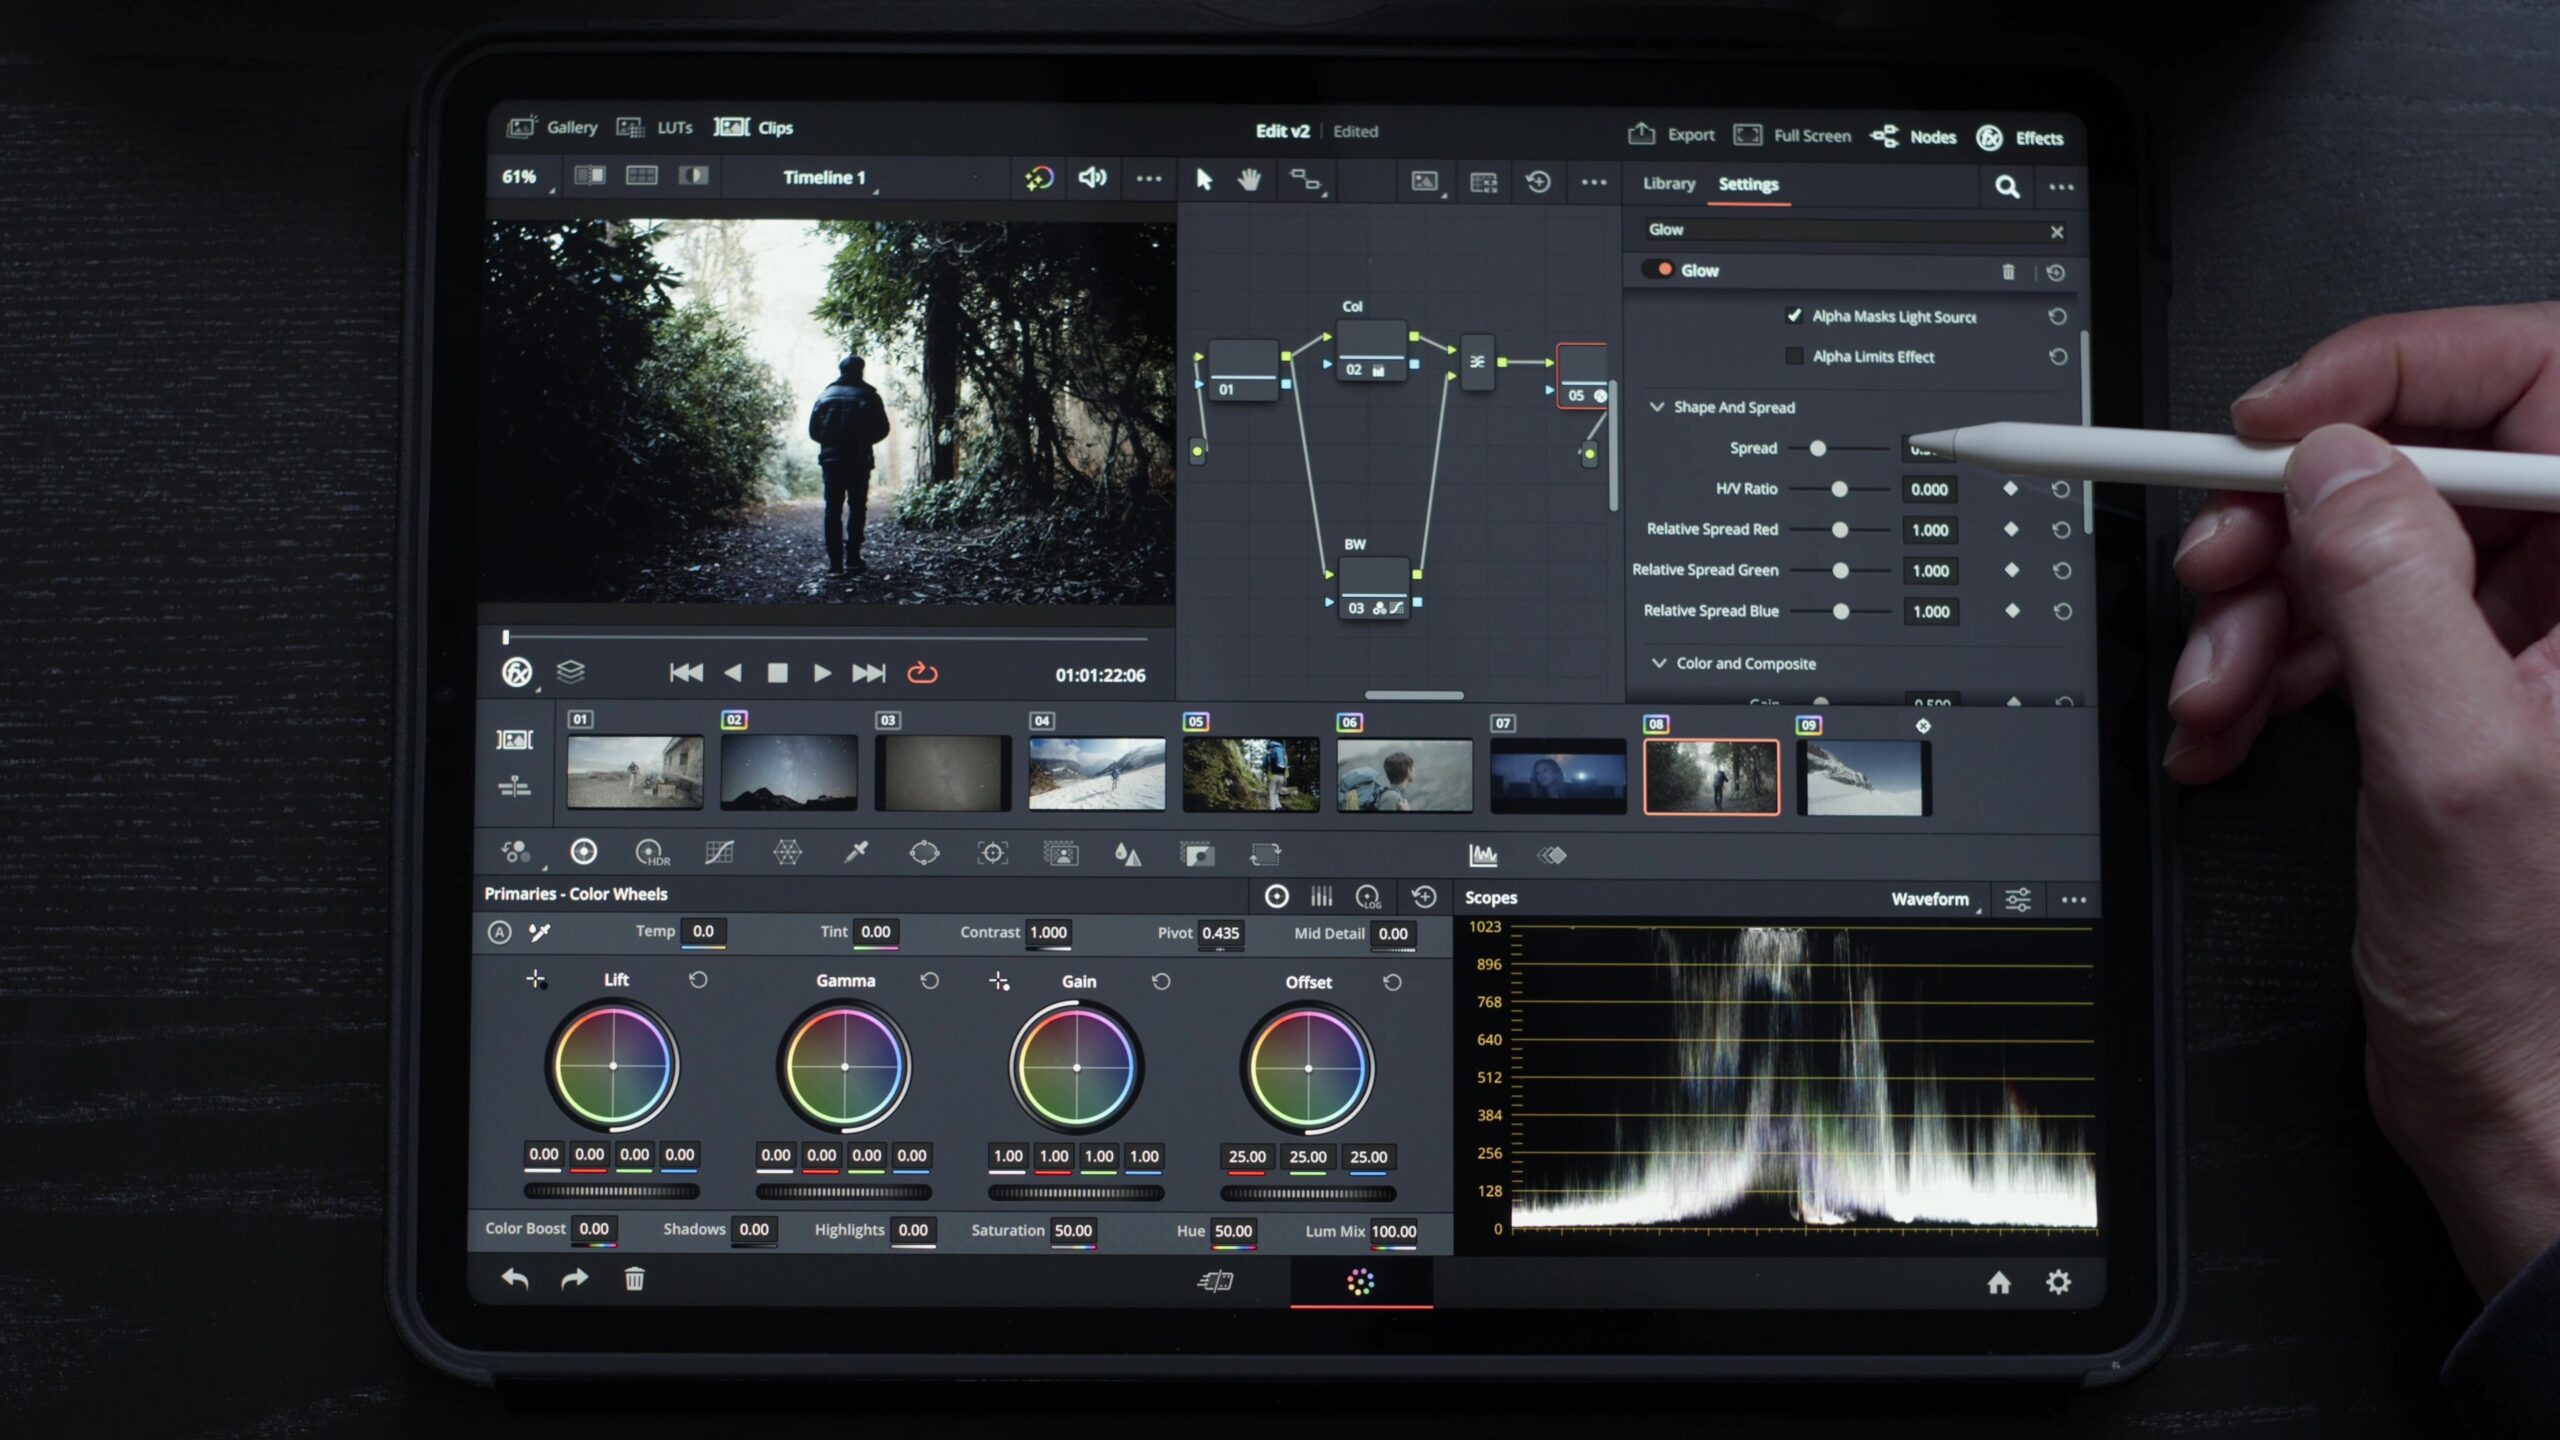
Even with all those effects and color grades applied, this clip still plays back perfectly in real time.
However, it is worth nothing that color grading on a screen this small can be challenging. To help with that, you can connect an external monitor via the iPad’s USBC port. We’ll demonstrate that another time, but for the time being, Resolve will allow you to choose whether the external display mirrors your iPad’s display or it can also send a clean video feed to it.
Nuances and limitations
We want to emphasize we’ve only had DaVinci Resolve on iPad for two weeks so we’re still learning all of its nuances.
Just the other day, we clicked the full screen button in the top right-hand corner and couldn’t work out how to get back. We imagine if we’d had a keyboard connected, we’d have been able to use the command F hot key. There’s probably a way of exiting full screen. It’s probably just us being stupid again, but for right now, we’re a little bit scared of that button.
As we mentioned before, this isn’t Resolve lite. It’s not a feature limited version of Resolve. It has about 95% of the features that you would find on the desktop version of Resolve.
There are some things that we’ve not been able to find in the color page. For example, we’ve not been able to work out how to enable remote grades. We’ve not yet worked out how to install LUTs either. There probably is a way of installing your own LUTs, we just haven’t discovered it yet.
And remember, while Resolve only has the cut and the color page at the moment, we’ve no doubt that the dev team is hard at work and bringing the other pages to the iPad. As mentioned, there’s no deliver page at the moment, all we’ve got is quick export. It allows you to export directly to social media platforms like YouTube.
Here’s a fun question.
Can you really open any project that you’ve created on the desktop version of Resolve? We found a project stored in Blackmagic Cloud which was created on the desktop version of Resolve, and it opened just as you’d expect. It’s just got a couple of clips in just so we can demonstrate some cool things to you.
First thing, what if you have a fusion composition in your timeline?
You can’t edit fusion compositions in Resolve on iPad at the moment, but you can play them, without dropping any frames at all. If you did have a fusion composition that was too much for the iPad to play, don’t forget there’s the ability to cache fusion output.

What if you open a project on your iPad and the media isn’t stored in the same location? If you relink it, will it mess up that project for use on your desktop computer?
No, that’s what path mapping is for. It allows you to relink files on your iPad without messing up the project on the original computer.
Finally, what if you have an unsupported codec in your project? For example, above is a Redcode file.
It’s not a problem. We rendered proxies on our desktop computer, so we’ll relink the proxies on our iPad, and now we can edit like normal with those files. Of course, if you want to export using the original Redcode media, you’ll have to do that back on your desktop computer.
Summary
Let’s answer those questions:
Is this the full version of DaVinci Resolve or is it limited?
While it only has the cut and color page, unequivocally, this is the full version of Resolve – bar a few minor features. As you saw, it even has the complete fusion render engine inside even though it doesn’t have the fusion page yet. We’re sure the dev team is busy working on bringing us the rest of the pages as quickly as they can.
Is it good enough to do professional work?
Yes. Again, within the limitations of the cut and color page, you can do everything that you can do on the desktop version.
Would you want to use this for professional work?
Well, for us, the answer is yes. We’re already using it in our work. We wouldn’t necessarily want to do all our work on it though, but you don’t have to choose. You can switch between desktop and iPad. Blackmagic Cloud makes that easy. You could use it for an entire project or you could just do parts of a project on it.
How well does it run?
Very well. It’s ridiculous, and it’s only in beta. We have experienced some crashes, but we’ve never lost any work thanks to Resolve’s live save feature. We’ll test some more complex workflows to see how it holds up, and we’ve no doubt that further optimization will happen before release.
What accessories do you need?
None, but a pencil helps. We love the speed editor, but it’s not necessary. Our favorite editing interface is still a keyboard and you can plug those in. You could use Apple’s official keyboards or something Bluetooth. You can even use a USB keyboard if you really want. You can also plug in external monitors and we’ll test accessories in the future.
When can I get it?
We’re not sure. It’s only in private beta at the moment but when it does come out, there will be two versions. A free version and a studio version. Studio will cost $95 and we’ll keep you updated as we learn more.
Overall, Resolve for iPad is very impressive.
This sounds stupid, but it works. And we cannot imagine the challenges of porting a program this complex to a completely different OS with a completely different form factor. In fact, it doesn’t just work. It works well, really well. It’s not Resolve lite. It is full fat Resolve. It has full compatibility with the desktop app and this is just the beta. This is going to be amazing.
For more tutorials about DaVinci Resolve or creative editing in general be sure to visit our Training Page. There, you can sign up for hours of free sample videos and more information about our full courses.
Leave Your Thoughts & Comments Below:


